20 Cement Texture Decor Ideas

Cement texture has gracefully evolved from an industrial afterthought into a staple of modern, high-end interior design. Its raw, matte finish and tactile versatility bring a sophisticated, grounded aesthetic to any living space. Whether you are looking to curate a minimalist sanctuary or add a sleek architectural edge to a cozy room, incorporating cement decor elements provides an effortless way to elevate your home. Below are twenty elegant and inspiring cement texture decor ideas designed to transform your space with style, creativity, and modern elegance.
1. Minimalist Cement Pillar Candle Holders

Introduction

Candlelight has an inherent warmth that instantly softens a room, but the vessel holding the flame can completely change the design narrative. Minimalist cement pillar candle holders offer a striking contrast between flickering warmth and industrial coolness, making them captivating statement pieces for any tabletop.

What This Idea Means

This concept focuses on creating geometric, solid-colored candle pillars using casting cement. The design relies on clean lines, smooth matte surfaces, and heavy mass to anchor tabletop decor arrangements naturally.

How to Make It

  1. Prepare the Form: Select sturdy cardboard tubes or plastic molds in cylindrical shapes. Coat the interior lightly with cooking oil or petroleum jelly for easy release.
  2. Mix the Cement: Combine fine-grain concrete mix and water in a mixing bucket until it reaches a thick, pourable oatmeal consistency.
  3. Pour and Set: Pour the mixture into your mold. Tap the sides gently with a mallet or spoon to release trapped air bubbles. Press a smaller candle-sized cup or cylinder into the center of the wet mix to create the candle indentation.
  4. Curing: Let the mold cure undisturbed for 48 hours. Carefully peel away the mold, sand any rough edges with fine-grit sandpaper, and seal with a matte concrete sealer.

Tips and Variations

  • Color Tinting: Mix iron oxide pigments into the wet cement before pouring to create charcoal gray, terracotta, or soft beige pillars.
  • Metallic Accents: Dip the bottom half of the cured holder in liquid gold leaf for an upscale contrast.

2. Floating Cement Wall Shelves

Introduction

Wall storage often serves a purely functional purpose, but floating cement shelves merge heavy architectural presence with weightless visual suspension. They provide an incredible stage for trailing plants, curated books, and delicate ceramics.

What This Idea Means

These are slim, sturdy wall-mounted ledges cast from lightweight concrete composites or wrapped in micro-cement, designed to mount flush against walls using heavy-duty hidden steel brackets.

How to Make It

  1. Build a Form: Construct a shallow wooden box mold matching your desired shelf dimensions, keeping in mind the thickness needed to house heavy-duty internal mounting brackets.
  2. Reinforcement: Place a galvanized steel mesh or reinforcing rebar inside the form to give the shelf structural tensile strength.
  3. Pouring: Pour a lightweight concrete mix containing perlite to reduce overall weight. Level the top surface smoothly.
  4. Finishing: Once cured for three days, un-mold, sand the edges until smooth, and apply a protective water-based matte sealer. Mount securely into wall studs using heavy bracket hardware.

Tips and Variations

  • Integrated LED Strips: Recess a warm-toned LED light strip along the bottom back edge of the shelf to cast a gorgeous ambient glow down the wall.
  • Rounded Corners: Use silicone inserts inside the wooden form to create soft, rounded front corners for a softer aesthetic.

3. Scalloped Concrete Catchall Trays

Introduction

Organizing everyday clutter like keys, jewelry, and pocket change does not have to be boring. Scalloped concrete catchall trays bring delicate, classical curves to the brutalist nature of cement, resulting in an exquisite balance of form and function.

What This Idea Means

A low-profile vanity or entryway tray featuring decorative scalloped edges and a smooth, polished interior basin, cast entirely in fine-textured grey concrete.

How to Make It

  1. Source a Silicone Mold: Find or create a flexible silicone mold featuring a scalloped rim design.
  2. Mix and Pour: Mix fine self-leveling concrete with water. Slowly pour it into the mold, ensuring it fills all the intricate scalloped grooves without trapping air.
  3. Vibrate the Mold: Shake and vibrate the mold gently to force air bubbles to the surface.
  4. Demold and Seal: After 24 to 36 hours of curing, carefully flex the silicone mold away from the hardened tray. Sand any imperfections, wash clean, and seal to prevent cosmetic staining.

Tips and Variations

  • Terrazzo Chips: Scatter tiny colored glass or marble chips into the bottom of the mold before pouring white cement for a colorful terrazzo effect.
  • Two-Tone Glaze: Paint the scalloped rim with a matte white or sage green acrylic wash while leaving the interior raw cement exposed.

4. Architectural Bookends with Brass Inlays

Introduction

Heavy books deserve bookends that command attention. Architectural cement bookends combine raw brutalist geometry with sleek metallic inlays, keeping your favorite reads stylishly upright while doubling as modern sculptures.

What This Idea Means

Heavy, geometric cement blocks adorned with slender brass strips or geometric cutouts that introduce a touch of warmth and luxury into an otherwise raw material.

How to Make It

  1. Construct Molds: Use melamine boards to build clean, sharp-edged rectangular or wedge-shaped casting boxes.
  2. Position Brass Accents: Secure thin brass sheets or rods vertically inside the form using hot glue so they remain upright during pouring.
  3. Pour Concrete: Pour a dense, aggregate-free concrete mix around the brass inserts.
  4. Cure and Polish: Allow to cure for 48 hours. Remove the forms, polish the exposed brass with a microfiber cloth, and seal the concrete body.

Tips and Variations

  • Asymmetrical Angles: Cast the bookends at a dramatic slant to give your bookshelf a dynamic, high-fashion architectural movement.
  • Felt Base: Glue a piece of soft felt or cork to the bottom of each bookend to protect your wooden bookshelves from scratches.

5. Textured Fluted Planters for Indoor Greens

Introduction

Houseplants look exceptionally vibrant when paired with contrasting pots. Textured fluted planters combine the organic beauty of lush foliage with sophisticated exterior ribbing cast directly into architectural concrete.

What This Idea Means

A cylindrical plant pot featuring vertical fluted ridges along its outer circumference, designed to hold indoor potted plants while offering elevated aesthetic appeal.

How to Make It

  1. Prepare the Outer and Inner Molds: Use a corrugated plastic pipe or a specially carved silicone liner inside a smooth outer bucket to form the fluted exterior texture.
  2. Pour the Mix: Pour high-strength concrete mix into the fluted cavity, ensuring you insert a central inner cylinder to create the hollow planting space.
  3. Drainage Hole: Press a cork or small plastic straw through the bottom wet mix to form a clean drainage hole.
  4. Demold: Let cure for two days, remove the molds carefully, drill out any minor blockages, and apply an interior waterproof membrane coating.

Tips and Variations

  • Ombre Wash: Dilute black acrylic paint with water and sponge it heavily around the base of the flutes, fading upward for a weathered, aged patina.
  • Mini Succulent Sets: Scale down the mold size to create a matching trio of miniature fluted pots for desktop window ledges.

6. Modern Geometric Wall Art Panels

Introduction

Wall decor sets the mood of a room. Heavy art pieces traditionally relied on heavy framing, but modern geometric wall art panels use molded cement tiles mounted directly to walls to create tactile, shadow-casting reliefs.

What This Idea Means

Lightweight cast cement tiles featuring angled, faceted geometric surfaces that catch natural sunlight throughout the day, creating shifting patterns of light and shadow.

How to Make It

  1. Create Geometric Forms: Build silicone molds featuring pyramid, chevron, or faceted triangle patterns.
  2. Lightweight Casting: Use a fiber-reinforced concrete mix to keep the individual tiles light enough for secure wall mounting.
  3. Curing: Cure the tiles flat under plastic sheeting for 48 hours to ensure maximum strength without cracking.
  4. Installation: Use heavy-duty construction adhesive or specialized interlocking backing clips to mount the tiles seamlessly onto a feature wall.

Tips and Variations

  • Mixed Media: Alternate raw cement tiles with warm oak wood panels in a geometric wall mosaic pattern.
  • White Wash Finish: Apply a translucent white wash over the tiles to soften the industrial gray tone while keeping the tactile texture visible.

7. Abstract Sculptural Table Lamps

Introduction

Lighting is jewelry for the home. An abstract sculptural table lamp crafted from smooth cement acts as a stunning art piece during daylight hours and casts a warm, inviting glow at night.

What This Idea Means

A contemporary lamp base featuring organic, asymmetrical curves or sleek brutalist blocks, paired with a clean linen drum shade and fitted with warm LED hardware.

How to Make It

  1. Design the Core: Form an organic shape using carved foam or flexible plastic tubing secured around a central PVC pipe (which will house the electrical cord).
  2. Pour Cement Composite: Pour a flowable concrete mixture around the core, tapping vigorously to eliminate voids.
  3. Wiring Assembly: Once fully cured and sanded, thread the electrical cord, socket, and harp through the internal PVC channel.
  4. Finishing: Seal the exterior surface with a satin clear coat to enhance the rich variations of the cured cement.

Tips and Variations

  • Exposed Edison Bulb: Skip the fabric lampshade entirely and top the cement base with a large, warm-glowing oversized Edison bulb for an industrial loft vibe.
  • Color Block Base: Mask off the top half of the lamp base and spray paint it matte black for a sharp, modern contrast.

8. Integrated Cement Coffee Table with Wooden Legs

Introduction

Anchor your living room seating area with a centerpiece that defies ordinary furniture design. An integrated cement coffee table combines the coolness of a smooth concrete top with the natural warmth of tapered wooden legs.

What This Idea Means

A durable, sleek rectangular or oval coffee table featuring a cast concrete slab top outfitted with solid wood mid-century modern legs.

How to Make It

  1. Build a Tabletop Form: Construct a melamine frame with smoothed-down edges. Lay down a welded steel reinforcement wire mesh inside the frame.
  2. Pour and Embed Brackets: Pour high-performance fiber-reinforced concrete into the form. Press threaded metal mounting inserts directly into the underside of the wet slab to securely attach the legs later.
  3. Level and Cure: Screed the top flat, cover with plastic, and allow to cure for at least one week to reach maximum load-bearing strength.
  4. Assembly: Sand the concrete top to a buttery-smooth finish, apply a penetrating stain-proof sealer, and screw in the wooden legs.

Tips and Variations

  • Waterfall Edge: Cast the top and side aprons as a single continuous piece that slopes down to the floor on both ends.
  • Polished Terrazzo Top: Grind down the surface of the cured tabletop with a diamond wet polisher to expose colorful embedded aggregates.

9. Minimalist Cement Wall Clock

Introduction

Timekeeping can be a masterclass in subtlety. A minimalist cement wall clock features clean lines, an absence of loud numbers, and a raw matte face that turns tracking time into a quiet visual meditation.

What This Idea Means

A sleek, round or square flat concrete clock face equipped with silent quartz clock movements and delicate metallic hands.

How to Make It

  1. Prepare a Circular Form: Use a shallow round cake pan or custom plastic hoop as a mold. Place a small plastic cap directly in the exact center to reserve a hole for the clock shaft.
  2. Cast the Face: Pour a thin layer of fine-aggregate concrete mix into the pan. Smooth the surface flat.
  3. Demold and Drill: After curing, remove from the mold and pop out the center plug. Drill a clean hole through if necessary.
  4. Hardware Installation: Insert the quartz clock mechanism through the back, secure the hands on the front, and hang securely.

Tips and Variations

  • Indented Hour Marks: Press small spherical beads or brass tacs lightly into the wet perimeter of the cement to serve as subtle hour indicators.
  • Neon Hands: Pair a dark charcoal concrete face with bright neon orange clock hands for a punchy modern pop of color.

10. Sleek Concrete Bathroom Soap Dispenser

Introduction

Small everyday accessories often dictate the overall polish of a bathroom. A sleek concrete soap dispenser brings spa-like luxury and industrial chic to your vanity sink setup.

What This Idea Means

A heavy, tactile liquid soap pump bottle cast from water-sealed concrete, paired with a durable stainless steel or matte black pump nozzle.

How to Make It

  1. Form Setup: Use a tall plastic bottle or custom silicone mold with a central core rod to create the hollow interior reservoir for liquid soap.
  2. Pouring: Pour dense, waterproofed concrete mix into the outer cavity. Tap thoroughly to remove air pockets.
  3. Thread Creation: Insert a threaded plastic neck ring into the top wet mixture so a standard soap pump can screw on securely once cured.
  4. Sealing: Demold after 48 hours, sand smooth, and coat the interior and exterior thoroughly with a food-safe, waterproof concrete sealer.

Tips and Variations

  • Matching Tumbler Set: Cast a matching toothbrush holder and small tray using the same concrete mix for a cohesive bathroom vanity collection.
  • Imprinted Botanical Motifs: Press a real fern leaf or delicate flower into the interior wall of the silicone mold before pouring to leave a subtle negative impression on the finished bottle.

11. Sculptural Cement Incense Burner

Introduction

Creating a calming atmosphere involves all the senses. A sculptural cement incense burner catches falling ash gracefully while adding a serene, meditative art piece to your meditation space or coffee table.

What This Idea Means

A low-profile, curved or disk-shaped concrete dish featuring a small brass or carved channel insert designed to hold incense sticks securely.

How to Make It

  1. Shape the Form: Pour concrete into a shallow circular or crescent-shaped silicone mold.
  2. Insert Holder: While the mix is wet, press a small brass tube or holder at a gentle angle on one end, and carve a shallow ash-catching groove across the surface.
  3. Curing and Finishing: Let cure, remove from the mold, sand down any rough spots, and seal with a heat-resistant matte finish.

Tips and Variations

  • Cone Incense Basin: Shape the center into a small depression designed to safely burn fragrant incense cones instead of sticks.
  • Earth-Tone Pigment: Mix raw umber or ochre pigment into the concrete to give it a warm, desert-sand appearance.

12. Industrial Chic Wall Hooks

Introduction

Entryway clutter vanishes when you have stylish places to hang coats, hats, and bags. Industrial chic wall hooks combine the robust strength of concrete with secure hidden mounting hardware for a clean, floating aesthetic.

What This Idea Means

Sturdy peg or knob-style wall hooks cast from high-strength concrete, designed to mount securely into walls to hold everyday outerwear and accessories.

How to Make It

  1. Mold Preparation: Use small cone-shaped or cylindrical silicone molds. Secure a double-ended hanger bolt or embedded metal nut directly into the center base of each mold.
  2. Pouring: Pour high-density concrete mixed with acrylic fortifiers into the molds.
  3. Setting: Allow the mix to cure fully for 48 hours to ensure the embedded hardware cannot pull out under heavy loads.
  4. Installation: Screw the protruding bolt directly into heavy-duty wall anchors mounted in your hallway.

Tips and Variations

  • Color-Capped Ends: Dip the front face of each hook into vibrant pastel or metallic paint for a playful color-blocked look.
  • Geometric Face Shapes: Use faceted crystal-cut silicone molds to give the hooks a diamond-like sparkling geometry.

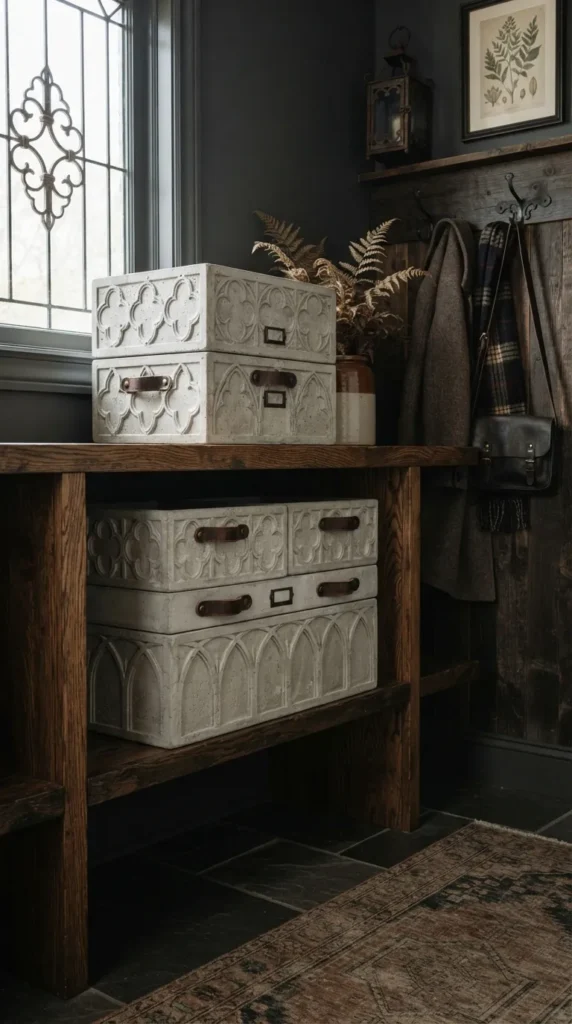
13. Decorative Cement Book Storage Crates

Introduction

Storage solutions can be both practical and aesthetically striking. Decorative cement-look storage crates offer a robust, modern alternative to traditional wicker or plastic bins, perfect for organizing magazines, throws, and toys.

What This Idea Means

Lightweight storage boxes finished with a micro-cement or textured concrete render, featuring integrated cutout handles for effortless portability.

How to Make It

  1. Base Structure: Build or source sturdy wooden storage boxes or heavy cardboard crates.
  2. Micro-Cement Application: Apply a thin, even layer of polymer-modified micro-cement paste over the entire exterior and interior rims using a trowel.
  3. Texturing: Use a sponge or spatula to create subtle movement and industrial clouding effects across the cement surface while it cures.
  4. Sealing: Sand the dried surface lightly to remove sharp burrs, then seal with a durable, scratch-resistant matte topcoat.

Tips and Variations

  • Leather Pull Straps: Attach heavy tan leather loops to the sides of the crate using brass rivets to serve as stylish pull handles.
  • Stenciled Monogram: Paint a subtle monogram or geometric crest onto the front face of the crate using a dark charcoal stencil.

14. Floating Cement Mantelpiece

Introduction

The fireplace is the natural focal point of a living room. A floating cement mantelpiece provides a clean, modern, fire-resistant architectural ledge that instantly modernizes traditional brick or drywall hearths.

What This Idea Means

A heavy-looking, streamlined beam shelf cast from lightweight concrete composite, mounted securely above a fireplace opening to display framed art and seasonal decor.

How to Make It

  1. Heavy-Duty Hollow Form: Construct a hollow box mold out of marine plywood, engineered to slip over a heavy internal steel wall-mounting skeleton.
  2. Lightweight Mix: Pour a high-performance glass-fiber reinforced concrete (GFRC) mix into the mold to minimize weight while maximizing structural strength.
  3. Curing: Cure under damp burlap and plastic sheeting for one week.
  4. Mounting: Bolt the heavy steel support tubes directly into your fireplace chimney masonry or wall studs, then slide the hollow concrete mantel beam over the supports and secure with hidden set screws.

Tips and Variations

  • Integrated Hearth Benches: Match the mantel material with low, elongated concrete hearth benches running along the base of the fireplace.
  • Textured Board-Formed Finish: Line the interior of the wooden mold with rough-sawn cedar planks before pouring so the concrete captures the gorgeous grain pattern of the wood.

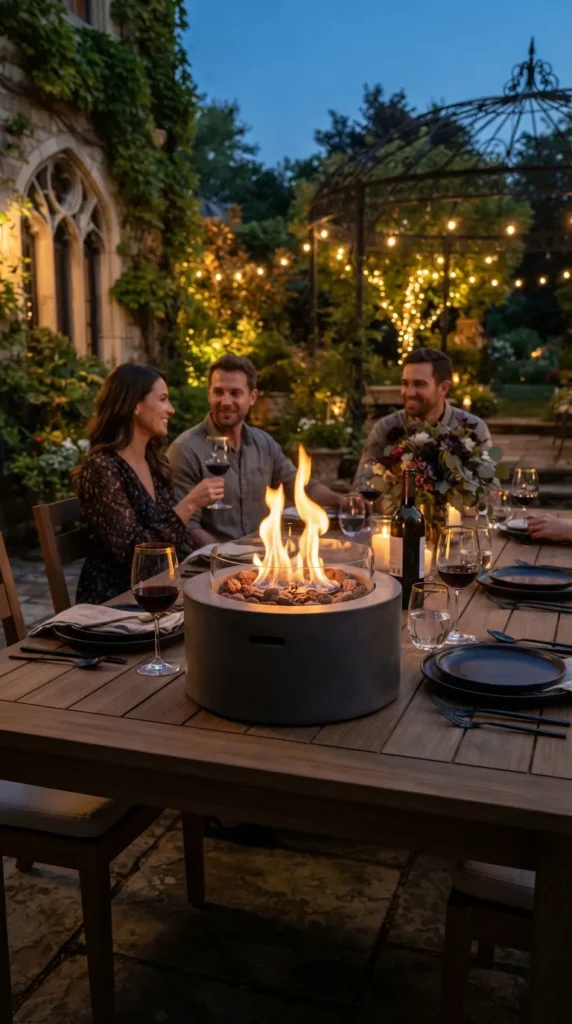
15. Modern Concrete Tabletop Fire Pit

Introduction

Bring the cozy ambiance of a campfire right onto your patio table or living room coffee table. A modern concrete tabletop fire pit burns clean bioethanol fuel, offering dancing flames framed in a sleek, fireproof vessel.

What This Idea Means

A bowl or trough-shaped concrete vessel designed to securely hold a stainless steel fuel cup filled with clean-burning bioethanol gel or liquid.

How to Make It

  1. Outer Vessel Mold: Use a large plastic salad bowl or custom bucket as the outer form.
  2. Inner Core: Position a smaller stainless steel canister or cup in the center, weighted down with stones so it stays centered when you pour.
  3. Pouring Fire-Resistant Mix: Pour a high-heat refractory cement mix around the center canister.
  4. Finishing: Cure for three days, remove the molds, sand smooth, and place your bioethanol fuel burner cup securely inside the central cavity.

Tips and Variations

  • Decorative River Rocks: Fill the empty space around the burner cup with smooth, heat-resistant black fire glass or polished river stones.
  • Hexagonal Geometry: Use a six-sided mold to give the fire pit a sharp, modern geometric profile.

16. Sculptural Cement Bud Vases

Introduction

Sometimes a single wildflower or dried botanical stem is all you need to brighten a room. Sculptural cement bud vases turn even the simplest blades of grass into high-fashion minimalist art arrangements.

What This Idea Means

Small, organically shaped concrete vessels featuring narrow neck openings designed to hold single stems or small sprigs of dried pampas grass.

How to Make It

  1. Simple Bottle Mold: Use small condiment bottles, test tubes, or silicone molds as the base shape.
  2. Pouring: Mix fine-grain casting cement and pour slowly into the mold around a central test tube that will hold the water.
  3. Demolding: Once cured, gently remove the outer mold while leaving the inner test tube in place to hold water securely.
  4. Sand and Seal: Smooth the base so the vase sits flat on tables, and seal the exterior with a waterproof matte finish.

Tips and Variations

  • Interlocking Cluster: Cast three different heights of bud vases with flat magnetic sides so they can snap together in various modular arrangements.
  • Gilded Rims: Paint the top rim of each bud vase with metallic copper paint for a stunning contrast against gray concrete.

17. Minimalist Cement Picture Frames

Introduction

Cherished memories deserve frames that do not distract from the photograph within. Minimalist cement picture frames offer heavy, tactile borders that frame family portraits and art prints with contemporary architectural grace.

What This Idea Means

A flat, solid concrete plaque featuring a recessed center cutout designed to securely hold glass, a backing board, and your favorite photography prints.

How to Make It

  1. Construct the Frame Form: Build a shallow wooden frame mold with a raised central block that creates the negative space where the picture sits.
  2. Cast the Plaque: Pour a fiber-reinforced concrete mix into the mold around the central spacer. Embed small magnetic clasps in the corners for the backplate.
  3. Curing: Allow to cure, remove the form, and sand all surfaces smooth.
  4. Assembly: Insert clear glass, your photo, and a matching cardboard or wooden back secured with small clips.

Tips and Variations

  • Embedded Pressed Florals: Press delicate dried leaves and pressed flowers directly into the wet surface along the frame border before it sets.
  • Desktop Stand Backer: Cast a matching concrete triangular kickstand strut onto the back of the frame for stable tabletop display.

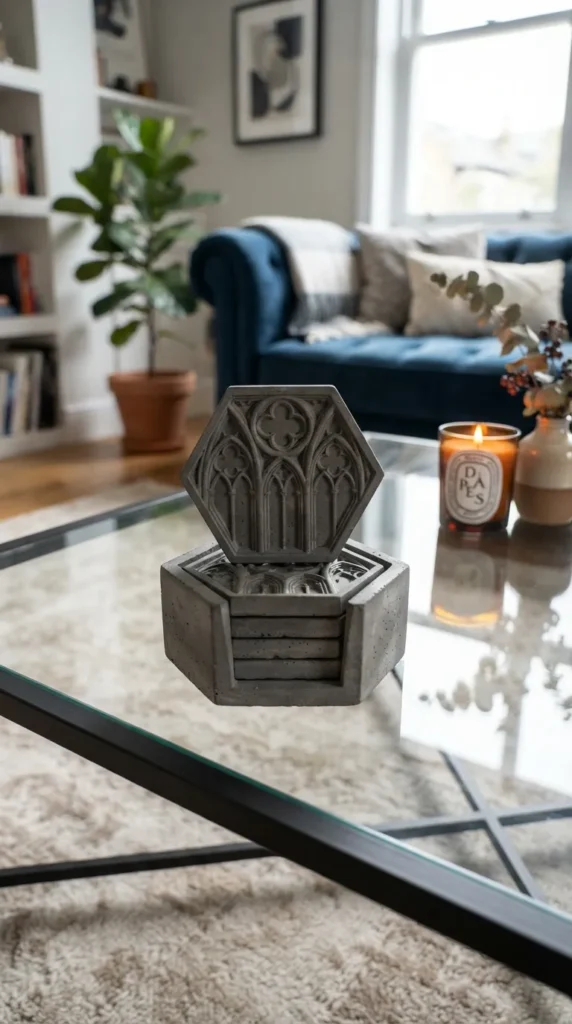
18. Architectural Concrete Coaster Set with Holder

Introduction

Protect your wooden coffee tables in style. An architectural concrete coaster set complete with a matching minimalist storage holder brings industrial sophistication to your daily beverage routine.

What This Idea Means

A stack of sleek, hexagonal or circular concrete drink coasters housed neatly inside a precision-cast matching concrete storage caddy.

How to Make It

  1. Coaster Molds: Use shallow silicone tile molds to cast uniform circular or hexagonal coasters.
  2. Caddy Form: Build a slightly larger square or matching geometric box mold with a center interior spacer to form the holder sleeve.
  3. Pouring: Cast all pieces simultaneously using a dense, water-resistant concrete mix.
  4. Protection: Once cured and sealed, stick small circular cork pads to the bottom of each coaster to ensure zero surface scratching on furniture.

Tips and Variations

  • Water-Repellent Nano Coating: Treat the top surface of the coasters with a hydrophobic concrete sealer so water beads up instantly without leaving rings.
  • Geometric Etched Patterns: Press rubber stamps into the wet surface of the coasters to imprint subtle geometric mandalas or grid patterns.

19. Textured Concrete Desk Organizer

Introduction

A tidy workspace fuels creativity. A textured concrete desk organizer keeps pens, sticky notes, paperclips, and phones neatly in their place while adding a sophisticated design element to your home office.

What This Idea Means

A multi-compartment heavy concrete block designed with customized slots and wells to hold everyday office stationery items.

How to Make It

  1. Design Compartments: Glue various small plastic blocks, cups, and phone-sized wooden rectangles onto the bottom of a shallow casting box to act as negative space cores.
  2. Pouring: Pour fine-aggregate concrete over and around your inserted blocks, tapping the container firmly to release trapped air bubbles.
  3. Demolding: After 48 hours, unscrew or pull out the internal blocks to reveal your custom pen slots and phone rest.
  4. Finishing: Sand the interior compartments and exterior edges smooth, and seal with a durable protective coat.

Tips and Variations

  • Cork-Lined Phone Slot: Glue a thin sheet of cork inside the phone compartment to cushion your mobile device when dropped into the slot.
  • Dual-Tone Finish: Paint the outer walls of the organizer in matte black while leaving the interior compartments raw natural gray concrete.

20. Statement Cement Tabletop Water Fountain

Introduction

Sound is a powerful design element that can instantly transform the mood of a room. A statement cement tabletop water fountain combines the soothing sound of trickling water with the grounding energy of raw brutalist concrete.

What This Idea Means

A self-contained indoor water feature featuring stepped concrete basins where water cascades gently over smooth geometric ledges, powered by a hidden submersible mini water pump.

How to Make It

  1. Basin Construction: Cast a large outer catch basin and two smaller elevated stepped tiers using waterproof concrete mixes.
  2. Tubing Integration: Run a concealed silicone tube through the center of the tiers, connecting it to a small, quiet submersible water pump hidden in the lower reservoir basin.
  3. Water Testing: Assemble the tiered pieces, fill with water, and test the flow rate to ensure smooth cascading without splashing over the edges.
  4. Sealing: Apply multiple coats of heavy-duty waterproof pond sealer inside all basins to prevent seepage.

Tips and Variations

  • Ambient Lighting: Conceal a waterproof sub-surface LED light inside the lower basin to illuminate the cascading water from below at night.
  • River Rock Bed: Surround the base of the fountain with polished black river rocks to diffuse the water sound into a gentle, relaxing trickle.