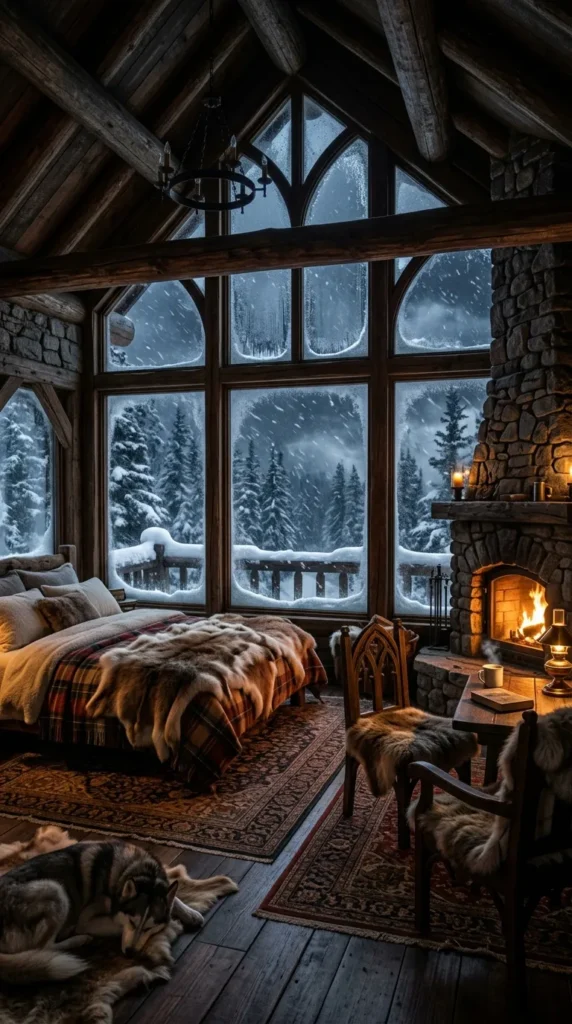
20 Loft Bedroom Layouts Minecraft

Creating a truly cozy space in Minecraft goes far beyond placing a bed on a dirt floor and sticking a torch next to it. It is an art form rooted in atmosphere, block depth, lighting balance, and visual warmth. Whether you are building a secluded sanctuary tucked inside an old-growth mega taiga or crafting a sleek, multi-level modern rustic loft, your bedroom should feel like a place where your character can genuinely unwind after a long day of mining and exploring.

This comprehensive guide breaks down 20 unique aesthetic woodland and loft bedroom layouts designed for survival and creative builders alike. Each concept explores spatial flow, texturing techniques, lighting integration, and functional design tips to help you transform standard blocks into immersive interior sanctuaries.
1. The Sunken Canopy Bed Sanctuary

Introduction

The Sunken Canopy Bed Sanctuary centers around level variation and soft frame enclosure. Instead of placing the bed level with the surrounding floor, this layout carves out a shallow recess in the room, creating an instant sense of shelter and intimacy within a woodland cabin setting.

What This Idea Means

This design relies on architectural compression. By stepping down into the sleeping area, the surrounding walls and canopy feel grander without scaling up the building’s exterior footprint. It blends old-world rustic forestry with luxurious modern interior layout principles.

How to Make It

  1. Dig out a 3×3 or 4×4 area in your floor that sits one block lower than the main room level.
  2. Line the stepped edge with upside-down Dark Oak or Spruce Stairs to create a smooth, recessed frame.
  3. Place your beds in the center of the pit, covering the floor around them with layered white and light gray carpets.
  4. Build four tall corner posts using Stripped Spruce Wood running up toward the ceiling.
  5. Connect the tops of the posts with Spruce Fences and place Oak Leaves combined with White Banners dangling down to simulate draped fabric and cascading ivy.

Tips & Variations

  • Lighting: Hide Glowstone or Froglights underneath the carpets inside the sunken pit for an ambient glow that eliminates exposed torches.
  • Palette Shift: Swap Spruce for Birch and Mangrove if you are building inside a tropical wood forest or want a lighter, sun-bleached look.
  • Storage Integration: Place Trapdoors over Chests tucked directly under the step edges of the pit to keep storage hidden yet functional.

2. The Split-Level Mezzanine Loft

Introduction

The Split-Level Mezzanine Loft utilizes verticality to separate your sleeping sanctuary from your functional living quarters. Ideal for small woodland cottages with high pitched roofs, this design creates two distinct living zones within a compact footprint.

What This Idea Means

Instead of expanding horizontally into your forest landscape, this layout takes advantage of vertical height. The bedroom floats elevated above a cozy ground-floor study, craft space, or fireplace hearth, accessible via an open ladder or custom stair structure.

How to Make It

  1. Construct a room with an interior height of at least 7 to 8 blocks.
  2. At the 4-block mark, build a platform using Spruce Slabs supported by Stripped Dark Oak Logs as structural support beams.
  3. Keep the platform border open, using Dark Oak Fences or Iron Bars as safety railings.
  4. Position your bed, a reading nook, and minimal decoration on the upper loft floor.
  5. Utilize the area beneath the mezzanine for a full crafting suite, including Anvils, Blast Furnaces, and Bookcases.

Tips & Variations

  • Open Sightlines: Avoid solid walls on the upper level; keep the loft railing minimal so light from ground-floor windows filters up through the entire build.
  • Stair Mechanics: Use Trapdoors attached to the sides of solid blocks as compact stairs to save precious ground-floor floor space.
  • Atmospheric Framing: Extend the roof trusses directly over the mezzanine, draping chains and Lanterns from the main ceiling ridge down toward the bed.

3. The Overgrown Forest Window Nook

Introduction

The Overgrown Forest Window Nook integrates nature straight into the interior architecture of the bedroom. Designed around a massive, multi-pane window bay, this layout puts the surrounding dense woodland biome on full display while surrounding the bed with indoor flora.

What This Idea Means

This build breaks the barrier between the indoors and outdoors. It uses glass depth, leaves, and potted greenery to make the bedroom feel like a seamless extension of the forest canopy surrounding your build.

How to Make It

  1. Frame out an exterior wall with a deep 3×3 or 5×3 recessed window bay using Glass Panes instead of full blocks for added depth.
  2. Build a raised platform along the glass using Spruce Slabs, placing your bed directly flush against the window frame.
  3. Surround the interior framing of the window with Moss Blocks, Azalea Leaves, and hanging Cave Vines.
  4. Scatter Flower Pots with Ferns, Bamboo, and Lily of the Valley along the window ledge.
  5. Place a small carpet and a bookshelf frame next to the window seat for a cozy reading aesthetic.

Tips & Variations

  • Window Panes vs. Blocks: Combine stained glass panes (Tinted or Brown) in the background with regular glass in front to simulate misty forest atmospheric depth.
  • Seasonal Foliage: Incorporate Flowering Azalea Leaves for a pop of soft pink, ideal for cherry blossom or birch forest locations.
  • Lit Foliage: Intersect a Light Block or Redstone Lamp hidden behind Moss Blocks to cast soft light through the leaf foliage into your room at night.

4. The Fireplace Hearth & Exposed Truss Suite

Introduction

Nothing defines a woodland refuge like the comforting crackle of a stone fireplace. The Fireplace Hearth & Exposed Truss Suite makes an grand hearth the visual focal point of the bedroom, balanced by heavy wooden ceiling framing.

What This Idea Means

This layout creates warmth both aesthetically and functionally. It pairs raw stone materials like Cobblestone, Deepslate, and Brick with rich, dark timber framing to anchor the bedroom inside a cold mountain forest biome.

How to Make It

  1. Build a grand fireplace against the central back wall using Deepslate Bricks and Cobblestone Stairs.
  2. Enclose a Campfire inside the hearth using Iron Bars, or use a Netherrack fire encased behind Stained Glass for safety.
  3. Construct open diagonal ceiling trusses overhead using Dark Oak Logs running from wall to wall.
  4. Position the bed across from the fireplace, angling it toward the warmth with a large carpet rug laid out in front.
  5. Flank the fireplace with tall, floor-to-ceiling Bookshelves and Armor Stands equipped with leather or iron gear.

Tips & Variations

  • Smoke Management: Place Hay Bales under your Campfire so the smoke drifts higher up through an authentic stone chimney structure outside.
  • Cozy Floor Texture: Mix Mud Bricks, Coarse Dirt, and Dark Oak Planks around the hearth area to simulate a weathered, high-traffic stone and timber floor.
  • Seating Details: Place Birch Stairs with signs on the sides facing the fire to create comfortable hearth-side armchairs.

5. The Glass-Dome Canopy Treehouse Loft

Introduction

Perched high up in the branches of a custom giant tree, the Glass-Dome Canopy Treehouse Loft provides an unobstructed 360-degree view of the surrounding forest while housing a complete, modern rustic bedroom suite inside a spherical shelter.

What This Idea Means

This build shifts the traditional bedroom layout from ground-bound cabins to high-altitude treetop sanctuaries. It relies on smooth organic curves, glass paneling, and living wood trunks to create an ethereal, natural loft environment.

How to Make It

  1. Construct or locate a large, custom-built tree trunk using Wood Logs with branching supports at the canopy level.
  2. Build a circular or glass-domed room resting directly within the branch intersections using Tinted Glass and Spruce Wood framing.
  3. Construct an interior loft level within the upper curve of the dome using Oak Slabs.
  4. Set the bed on the loft platform facing outward toward the glass perimeter.
  5. Weave Spore Blossoms into the ceiling canopy so green particles gently drift down throughout the interior airspace.

Tips & Variations

  • Particle Effects: Spore Blossoms add an extraordinary magical atmosphere to high-altitude forest builds—always place them in ceiling leaf blocks.
  • Vertical Travel: Use Water Columns framed in glass or ladder-wrapped vines around the main trunk for sleek vertical access to the upper loft.
  • Foliage Integration: Allow real leaves to break into the interior glass wall, making it look as though the tree is holding the bedroom structure gently in place.

6. The Rustic A-Frame Attic Retreat

Introduction

The A-Frame Attic Retreat captures the timeless, triangular architectural silhouette of remote mountain cabins. Nestled immediately under steep, sloping roof structures, this bedroom layout maximizes small spaces with cozy, angled ceiling slopes.

What This Idea Means

By building into the tight roof geometry of an A-frame building, this layout eliminates wide open headroom in favor of a snug, low-ceiling atmosphere that emphasizes warmth and structural timber aesthetics.

How to Make It

  1. Construct a steep roof structure using Dark Oak or Spruce Stairs sloping inward until they meet at a sharp central peak.
  2. Strip the structural log beams that frame the interior of the roof incline to reveal a warm, light wood grain texture underneath.
  3. Nestle the bed flat against the far gabled end wall directly beneath a round or diamond-shaped window frame.
  4. Utilize the narrow, low-clearance spaces along the sides of the room for Chest storage, Barrels, and Lecterns.
  5. Run a line of Chain-hung Lanterns straight down the highest center line of the roof peak.

Tips & Variations

  • Window Shapes: Try creating a round window using upside-down stairs placed in a circle around a central 2×2 opening to break up the harsh straight lines of the A-frame.
  • Low Wall Accent: Use Trapdoors as wall paneling along the lowest floor-to-ceiling edges where normal blocks cannot fit due to the roof angle.
  • Patterned Rugs: Combine Glazed Terracotta tiles in muted tones with wool carpets to make dynamic rug patterns on the wooden plank floor.

7. The Deepslate & Moss Woodland Cellar Loft

Introduction

For those who prefer a ground-submerged or cliffside mountain aesthetic, the Deepslate & Moss Woodland Cellar Loft offers an earthy, subterranean bedroom sanctuary that combines rugged mountain stone with lush natural flora.

What This Idea Means

This concept brings the forest floor underground. It shifts away from pure wooden cabin interiors by using cool-toned, weathered stone textures contrasted sharply against bright moss, glowing flora, and warm wood accents.

How to Make It

  1. Excavate a room straight into a forest cliff face or below your cabin floor, lining walls with Deepslate Bricks, Tuff, and Cobbled Deepslate.
  2. Replace portions of the floor and lower walls with Moss Blocks, Moss Carpets, and Mud Bricks for a lush, damp environment texture.
  3. Build a raised timber loft platform out of Dark Oak Slabs in one corner to elevate the bed above the damp stone floor.
  4. Integrate Glow Berries hanging from mossy ceiling crevices to serve as natural, dim light sources overhead.
  5. Add a small interior stream feature cascading down a stone alcove into a tiny pool lined with Lily Pads.

Tips & Variations

  • Texture Blending: Mix Cracked Deepslate Bricks and Mossy Cobblestone into the walls to give the cave interior a long-abandoned, historic feel.
  • Atmospheric Sound: Place a hidden Water block above a dripstone point nearby to generate gentle ambient water droplets overhead.
  • Warm Contrast: Use Orange or Yellow beds and matching wool accents to provide a striking, warm contrast against the dark deepslate walls.

8. The Botanical Glasshouse Bedroom

Introduction

Combining early Victorian greenhouse architecture with cozy woodland living, the Botanical Glasshouse Bedroom encapsulates the sleeping space completely within a structure made of glass, polished stone, and abundant plant life.

What This Idea Means

This design focuses on light saturation and green aesthetics. It treats the bedroom as a sunroom living museum where rare plants, crops, and decorative flowers take equal priority alongside comfortable furniture.

How to Make It

  1. Build a high, arched structural frame using Polished Deepslate or Blackstone Arches filled completely with clear Glass Panes.
  2. Construct a central raised floor section using Polished Andesite or Quartz, leaving border channels along the walls for rich dirt planting beds.
  3. Fill side planters with Azalea Bushes, Flowering Crops, Pitcher Plants, and Tall Ferns.
  4. Position a wooden canopy bed right in the absolute center of the glasshouse room directly beneath the highest glass arch curve.
  5. Hang Iron Lanterns and Copper Bulbs at varying heights from structural crossbeams using Chains.

Tips & Variations

  • Dynamic Lighting: Oxidized Copper Bulbs offer a muted, soft industrial glow that complements green foliage perfectly.
  • Weather Ambiance: Building this layout in a high-rainfall biome (like a Jungle or Taiga) yields relaxing rain visuals overhead through the glass roof.
  • Pottery Accent: Use Decorated Pots stacked with wild flowers around the perimeter of the bed for refined, handcrafted detail.

9. The Minimalist Japanese Forest Loft (Minka Style)

Introduction

Drawing inspiration from traditional Japanese Minka rural architecture, this loft layout emphasizes clean horizontal geometric lines, low-profile furniture, natural paper light diffusion, and calm, clutter-free spaces.

What This Idea Means

This layout strips away chaotic decoration in favor of spatial balance and natural texture harmony. It uses low-level bedding, open screens, and subtle warm lighting to construct a peaceful, reflective woodland retreat.

How to Make It

  1. Build a low, wide room using Stripped Bamboo, Birch Wood, and White Concrete or White Terracotta for the wall surfaces.
  2. Construct Shoji-style wall dividers using Birch Fences or Light Gray Stained Glass Panes set within dark wooden frames.
  3. Set up a low bedding area directly on the floor using Smooth Quartz Slabs topped with Red or White Carpets to imitate a traditional futon.
  4. Place a minimal workspace featuring a Lectern, a single Potted Bamboo stalk, and a Birch Trapdoor desk surface nearby.
  5. Illuminate the space using Shroomlights or Redstone Lamps fully enclosed behind Birch Trapdoors or White Banners.

Tips & Variations

  • Mat Flooring: Use Dried Kelp Blocks mixed with Birch Planks to create authentic-looking Tatami mat floor layouts.
  • Zen Garden View: Position the main sleeping room so it opens out onto an enclosed exterior courtyard featuring a small gravel garden and Cherry Blossom trees.
  • Horizontal Balance: Avoid tall vertical furniture pieces; keep bookshelves, chest storage, and accent tables short and low to the ground.

10. The Waterfall Cliffside Loft

Introduction

Carved into the face of a towering cliff overhang inside a woodland ravine, the Waterfall Cliffside Loft integrates flowing water currents directly into its floor-to-ceiling layout, creating dynamic movement and natural sound.

What This Idea Means

This build leverages high vertical drops and dramatic mountain geography. It turns an exterior natural landmark—a cascading waterfall—into the defining architectural feature of an open-air modern mountain loft.

How to Make It

  1. Find or carve a large cavern opening directly into a vertical mountain cliff face overlooking a forest biome.
  2. Build a structural cantilevered floor extending out over the drop using Dark Oak Logs and Smooth Stone Slabs.
  3. Route a natural water stream to pour cleanly through one side of the room, falling into an opening in the floor or down the exterior cliff face.
  4. Erect a loft platform above the water flow using Oak Slabs and Trapdoor railings, placing the bed safely overhead.
  5. Install full structural Glass Panes from floor to ceiling along the open mountain cliff face for breathtaking environmental views.

Tips & Variations

  • Safety Railings: Use Glass Panes or Spruce Fences along interior drop-offs to prevent accidental falls into the ravine below.
  • Hidden Drops: Place a Water Column elevator hidden behind the cascading indoor waterfall for covert vertical movement between base levels.
  • Ambient Lighting: Hide Sea Lanterns behind the flowing water source to make the entire liquid curtain glow softly at night.

11. The Enchanted Library Bedroom Suite

Introduction

The Enchanted Library Bedroom Suite caters to arcane scholars, surrounding a cozy woodland bed layout with towering shelves of knowledge, floating magical glyph particles, and rich, deep color accents.

What This Idea Means

This layout merges magical functional mechanics with aesthetic comfort. It treats the bed as an integral component of an ancient wizard’s research study tucked deep within an old-growth forest.

How to Make It

  1. Build high structural walls lined fully with multi-tiered Bookcases, utilizing Chiseled Bookshelves for variable visual texture and depth.
  2. Place a fully functional Enchanting Table in the center of the room, ensuring proper 15-bookshelf placement geometry around it.
  3. Build a raised sleeping loft directly built on top of the main bookshelf structures, reached by a winding ladder.
  4. Decorate using Dark Oak Wood, Crimson Planks, and Crying Obsidian blocks to introduce mysterious purple and red tones.
  5. Place Candles on top of bookshelves and desk surfaces, lighting them to produce gentle flickering flame visuals.

Tips & Variations

  • Chiseled Bookshelf Details: Partially fill Chiseled Bookshelves with Redstone Books to add pops of color and dynamic texture across your walls.
  • Color Pairing: Dark Oak paired with Red/Purple carpets creates a dramatic, dark academia aesthetic that fits perfect inside thick dark forest biomes.
  • Floating Particles: The Enchanting Table continuously draws glowing glyph particles from surrounding books, elevating the bedroom’s magical atmosphere.

12. The Industrial Rust-Wood Loft

Introduction

The Industrial Rust-Wood Loft merges rugged, heavy structural metal elements like iron, copper, and chain links with warm, raw forest woods, yielding a tough yet surprisingly atmospheric mountain retreat.

What This Idea Means

This layout bridges the gap between mechanical design and rustic wilderness living. It showcases exposed structural supports, heavy chains, utility pipework, and raw timber beams.

How to Make It

  1. Build structural walls out of Mud Bricks, Weathered Cut Copper, and Polished Basalt columns.
  2. Frame an elevated loft bed platform using Iron Bars, Chain links, and Anvils as heavy structural support posts underneath.
  3. Construct a bed frame out of Copper Blocks, allowing them to oxidize naturally over time into a gorgeous rustic teal tone.
  4. Route lines of Exposed Lightning Rods and Copper Pipes across the walls to simulate visible interior utility conduits.
  5. Use Copper Bulbs and Redstone Torches for industrial, moody light levels throughout the loft space.

Tips & Variations

  • Waxing Metal: Use Honeycombs to wax your Copper blocks at your preferred stage of rust (either fresh orange, lightly weathered, or full teal).
  • Storage Aesthetics: Replace standard chest storage with Barrels and Vault-style iron structures built out of Blast Furnaces and Grindstones.
  • Floor Texturing: Combine Polished Andesite, Gravel, and Slate Blocks to create a dense, heavy industrial floor pattern.

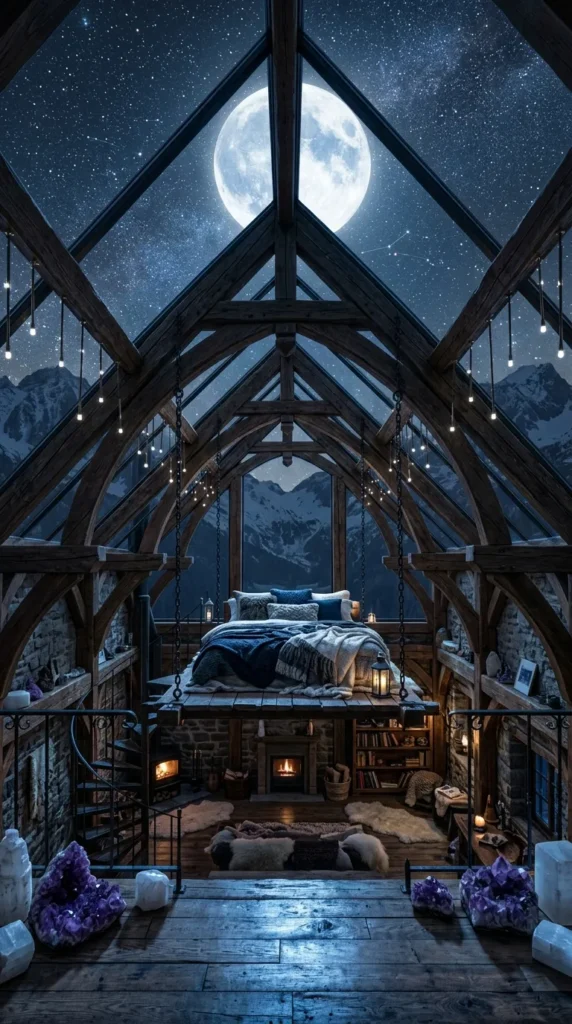
13. The Floating Celestial Moon Loft

Introduction

Designed for high-altitude peaks or deep night sky lovers, the Floating Celestial Moon Loft features an exposed glass ceiling ceiling framework built to capture views of the stars, moon phases, and passing clouds.

What This Idea Means

This build maximizes skyward sightlines. By focusing structural framing upward rather than outward, this layout brings the celestial night environment directly into the master bedroom.

How to Make It

  1. Build a room with an oversized angled or vaulted roof constructed entirely out of Stained Glass Panes (Black, Light Blue, and Purple tint mixes).
  2. Construct a floating central loft platform anchored to the ceiling beams using suspended Chains instead of ground posts.
  3. Place the bed directly beneath the highest glass roof arch so the night moon tracks directly overhead as you sleep.
  4. Incorporate End Rods horizontally and vertically into the framing to simulate bright, minimal star-like light fixtures.
  5. Line floor edges with Amethyst Clusters and Calcite blocks for a mystical celestial mineral theme.

Tips & Variations

  • Clock Integration: Place a Frame containing a Clock item right next to the bed so you can monitor night and day celestial cycles accurately.
  • Night Sky Tinting: Layering Blue Stained Glass over Black Stained Glass creates rich visual depth when looking up at the night sky.
  • Amethyst Sounds: Walking over Calcite and Amethyst block walkways provides soothing step audio effects whenever you walk through your room.

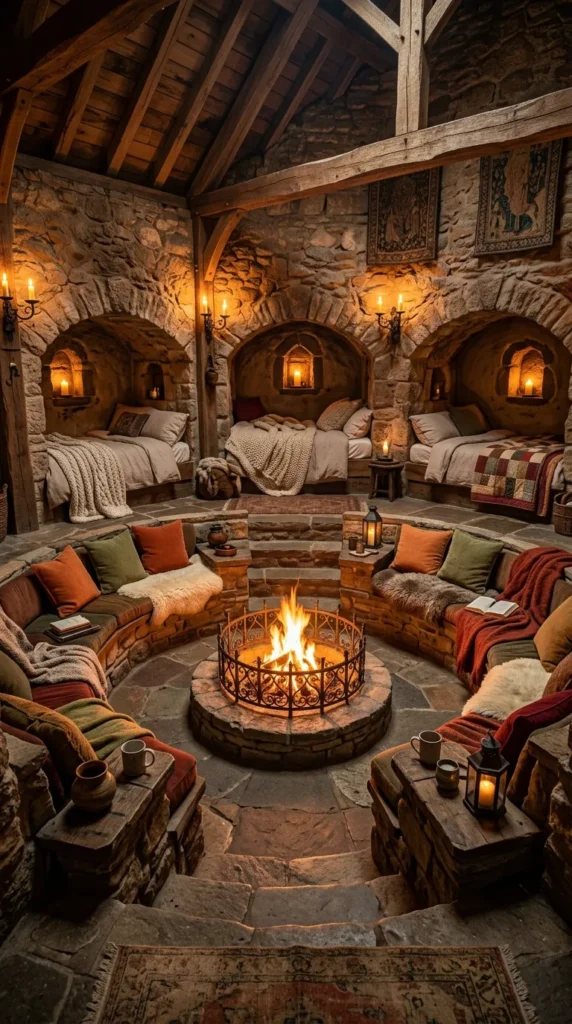
14. The Sunken Fire Pit Sleeping Nook

Introduction

Centering the entire bedroom experience around a cozy underground fire pit, this layout places warmth at the physical level of your feet, creating a campfire-inspired indoor lounge experience.

What This Idea Means

This design borrows from rustic gathering pits and subterranean living. It prioritizes comfortable sitting and sleeping areas surrounding an open, contained indoor pit fire.

How to Make It

  1. Carve a 5×5 area in the middle of your room down by two full blocks.
  2. Build stepped seating along all four interior walls of the pit using Dark Oak Stairs and Wool Cushioning.
  3. Place a central fire feature (Campfire enclosed by Soul Sand or Trapdoors) in the middle of the lower floor pit.
  4. Build built-in sleeping alcoves directly into the sidewalls of the sunken pit using beds tucked flush into 2×1 wall recesses.
  5. Encase the top perimeter edge of the pit with Oak Fences or Chains to frame the drop cleanly.

Tips & Variations

  • Soul Campfire Swap: Use a Soul Campfire for cool blue flames and a calmer, more serene lighting ambiance compared to standard orange fire.
  • Smoke Traps: Place a Hopper or Iron Bars directly above the fire pit leading into a ceiling chimney vent to look visually realistic.
  • Wall Niches: Carve small 1×1 holes into the walls surrounding the pit to display Flower Pots, Candles, and Armor Trims.

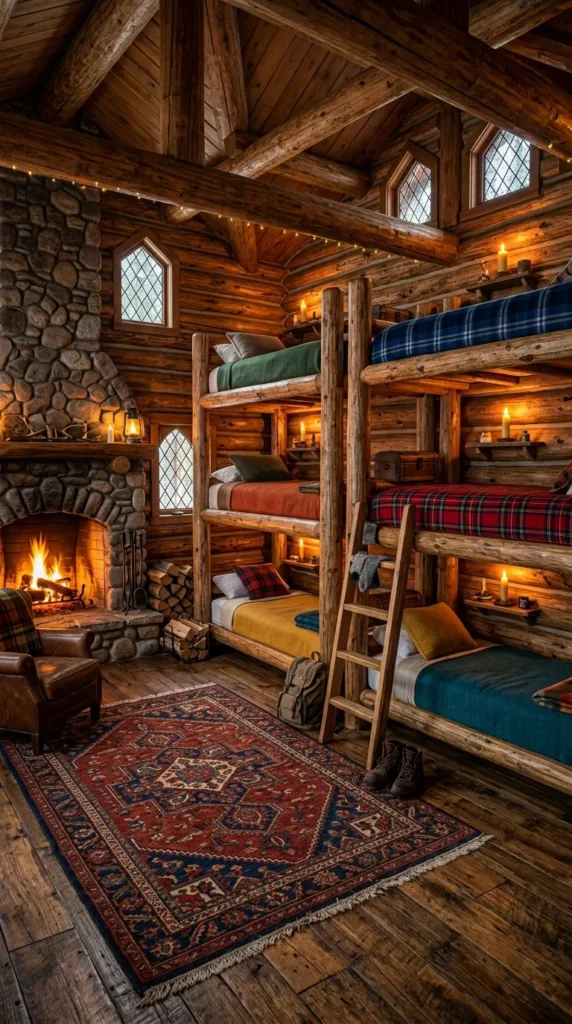
15. The Cozy Bunkhouse Multi-Bed Loft

Introduction

Designed for multiplayer survival worlds or bases that need to accommodate multiple players, the Cozy Bunkhouse Multi-Bed Loft packs high-density sleeping quarters into an attractive, space-efficient wood cabin format.

What This Idea Means

This layout turns high capacity into a visual asset. Instead of placing random beds across a floor, it builds custom stacked bunk beds complete with ladders, individual storage, and personalized reading corners.

How to Make It

  1. Construct tall walls using a framework of Spruce Logs and Stripped Oak Wood.
  2. Build stacked 2-tier bunk bed structures along the main walls using Wooden Trapdoors as side frames and headboards.
  3. Install individual ladders running up the side of each bunk structure for access to upper beds.
  4. Recess a small 1×1 space next to every bed for an individual Barrel storage chest and a personal Candle light source.
  5. Create a shared central lounge area on the main floor with a massive carpet rug, a fireplace, and armor display racks.

Tips & Variations

  • Color Coding: Use different colored Beds and Banners for each bunk so every player on your server has an easily identifiable custom space.
  • Privacy Curtains: Attach Banners onto the top edges of bunk frames to act as privacy curtains that can visually close off each sleeping bed berth.
  • Personalized Nooks: Place a Framed item unique to each player above their respective headboard for personal flair.

16. The Coastal Birch Woodland Pier Loft

Introduction

Set where a birch forest meets a quiet lake or ocean shore, the Coastal Birch Woodland Pier Loft builds out over the water, combining light birch timbers, open sea views, and gentle water reflections.

What This Idea Means

This layout transitions from land to water. It utilizes light-toned woods, breezy open-air window spaces, and over-water decking platforms to craft a airy, nautical woodland retreat.

How to Make It

  1. Extend a wooden pier platform out over a lake or ocean surface using Birch Planks resting on Stripped Birch Log support pilings submerged in water.
  2. Build an airy bedroom structure overhead featuring light wall materials like Sandstone, Birch Wood, and White Concrete.
  3. Construct expansive double-hung open windows facing out across the open water body.
  4. Build an upper loft level using Birch Slabs, placing a light gray or white bed right along the water-view wall.
  5. Tie boat docks directly to the structural piers below the bedroom loft using Fences and Lead attachments.

Tips & Variations

  • Piling Texturing: Mix Prismarine or Mossy Cobblestone into the submerged bottom portions of your wooden log pilings to simulate water wear and algae.
  • Light Palette: Birch, Sandstone, and White Wool keep the room feeling bright and spacious, maximizing daytime sunlight bounce.
  • Exterior Decking: Add a small exterior balcony off the upper loft using Birch Trapdoors as floor decking to step outside over the water.

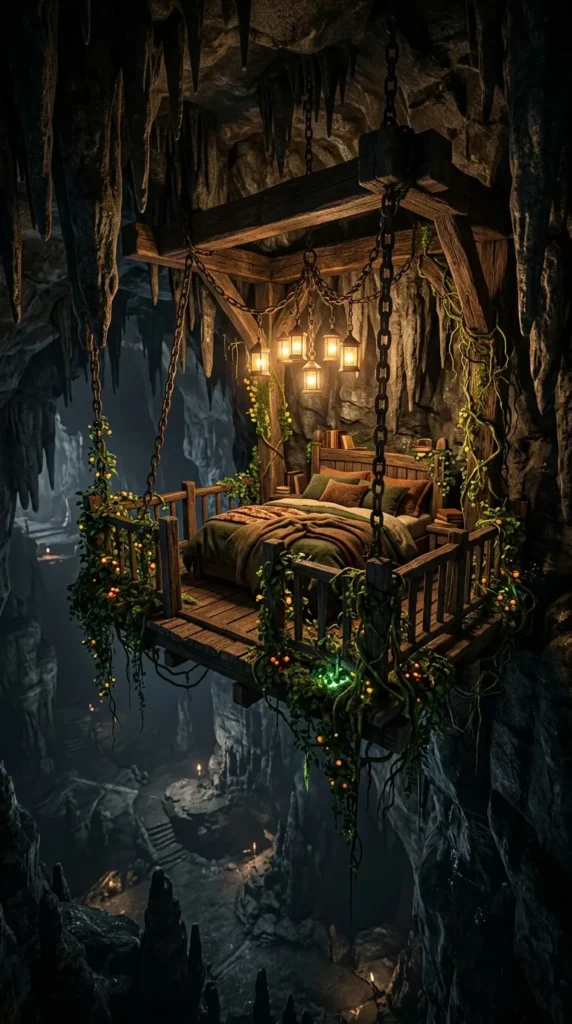
17. The Overgrown Overhang Cave Loft

Introduction

Built directly into the ceiling roof of a massive natural cave system, the Overgrown Overhang Cave Loft suspends a high-altitude home completely upside down from cavern stone structures.

What This Idea Means

This layout flips traditional floor-anchored construction on its head. It suspends living platforms high above the cave floor, surrounded by stalactites, hanging vines, and dramatic underground scale.

How to Make It

  1. Find a cavern with high stone ceilings and dramatic overhang geometry.
  2. Anchor heavy Dark Oak Log beams high up into the cave ceiling stone.
  3. Suspend a multi-level wooden platform downward using long vertical runs of Iron Chains.
  4. Build your bedroom layout onto this suspended platform, placing safety walls made of Leaves and Fences around all edges.
  5. Wrap Glow Berries and Cave Vines around the suspension chains to integrate nature and ambient lighting directly into the structural supports.

Tips & Variations

  • Void Views: Leave structural gaps in the floor covered with Glass Panes so you can safely peer straight down into the cavern depths beneath your bed.
  • Dripstone Accents: Leave natural Pointed Dripstone formations along the roof framing above the bed for rugged natural cave interior details.
  • Light Balance: Keep light soft using Candles and Lanterns to preserve the dramatic moody shadows of the surrounding natural cave environment.

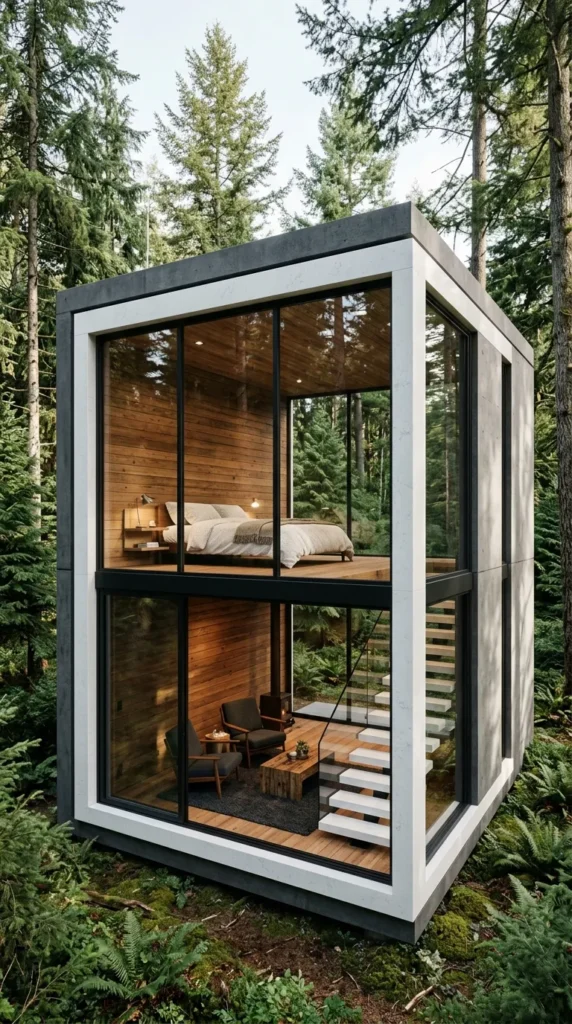
18. The Modern Rustic Glass-Cube Loft

Introduction

The Modern Rustic Glass-Cube Loft combines crisp, 90-degree modern architectural lines with rugged natural forest materials, creating a sleek, contemporary cabin structure nestled in untouched wilderness.

What This Idea Means

This style relies on contrast. It pairs clean, geometric quartz and black glass frames with raw, unstripped logs, coarse stone, and dense natural surrounding forest vegetation.

How to Make It

  1. Construct a rigid, box-shaped frame out of Smooth Quartz Blocks or Black Concrete.
  2. Fill large wall spans with floor-to-ceiling Black Stained Glass Panes for a sleek exterior finish.
  3. Finish the internal flooring and accent walls using rich, warm Spruce and Dark Oak Planks to introduce natural warmth.
  4. Construct an open floating staircase out of Quartz Slabs leading up to a sleek upper sleeping loft platform.
  5. Place minimal modern furniture: a low white bed, an Armadillo Scute or Armor Stand display, and recessed Sea Lantern floor lights.

Tips & Variations

  • Framing Contrast: The stark difference between dark glass, white quartz, and deep brown wood creates an instant high-end architectural look on Pinterest feeds.
  • Roof Gardens: Transform the flat modern concrete roof into a green garden roof featuring Azalea bushes, moss, and seating benches.
  • Hidden Lighting: Hide light sources beneath Quartz Slabs or behind Trapdoor wall panels to maintain a clean, wire-free modern look.

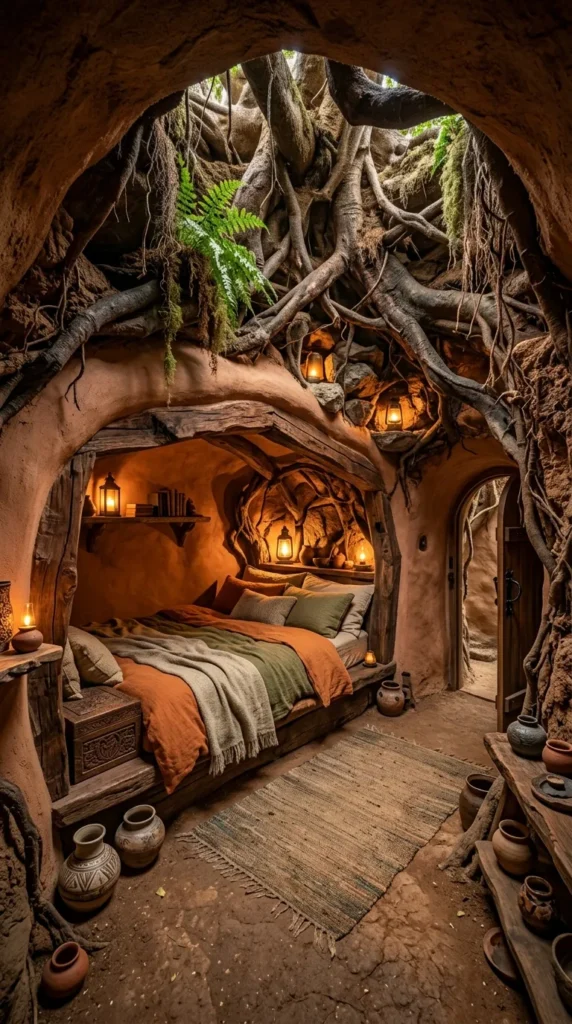
19. The Underground Roots & Terracotta Chamber

Introduction

Rooted deep beneath a ancient forest tree, this subterranean chamber utilizes earthy terracotta tiles, hanging tree roots, and warm clay tones to deliver an enclosed, cozy earthen shelter.

What This Idea Means

This build reflects living directly within the earth beneath the forest canopy. It utilizes subterranean clay textures, warm ambient orange lighting, and organic root systems invading the interior living space.

How to Make It

  1. Dig a circular underground chamber directly underneath the root system of a massive oak or dark oak tree.
  2. Line the rounded walls with Terracotta, Brown Terracotta, and Packed Mud blocks for a smooth, warm earth texture.
  3. Insert Mangrove Roots and Hanging Roots into the ceiling stone, making them spill downward into the room airspace.
  4. Construct a low built-in bed nook carved straight into the terracotta wall curve, framed with Mangrove Wood Slabs.
  5. Illuminate the space using Ochre Froglights or Shroomlights hidden behind Root blocks for a warm natural glow.

Tips & Variations

  • Mud & Clay Palette: Mixing Mud Bricks with Terracotta provides rich, subtle color variations that look hand-carved and rustic.
  • Spore Blossom Particles: Placing a Spore Blossom above the root ceiling creates a continuous shower of green forest particles inside the underground bunker.
  • Compact Storage: Use Mud Brick Walls and Barrel stacks built directly into wall cutouts to save floor space while maintaining the earthy theme.

20. The High-Altitude Taiga Peak Watchtower Loft

Introduction

Perched atop the highest snowy peak of a taiga mountain range, the High-Altitude Taiga Peak Watchtower Loft offers an elevated, fortified lookout bedroom layout designed to withstand harsh mountain blizzards while maintaining extreme interior warmth.

What This Idea Means

This design combines military lookout tower architecture with high-altitude cozy cabin interiors. It presents a tall vertical structure with panoramic views across frozen pine forests and jagged mountain crests.

How to Make It

  1. Build a tall, octagonal stone tower frame using Cobbled Deepslate, Stone Bricks, and Mud Bricks up on a mountain peak.
  2. Construct an expanded top floor loft section that overhangs the lower stone walls using heavy Dark Oak Support Brackets.
  3. Wrap the upper loft level in large windows made of Glass Panes, framed by Spruce Logs and Trapdoor shutters.
  4. Place a central fire stove in the middle of the room using a Lit Smoker or Campfire enclosed in Trapdoors with an Iron Chain chimney running upward.
  5. Position your bed on a small raised platform facing out toward the snowy mountain biome landscape.

Tips & Variations

  • Snow Accumulation: Allow Snow Layers to gather naturally on the roof and window sills outside to emphasize the extreme cold environment outside your warm room.
  • Weatherproof Aesthetics: Frame window exteriors with Spruce Trapdoors to simulate heavy storm shutters built to withstand high-altitude mountain winds.
  • Panoramic Balcony: Wrap an exterior wooden walkway around the perimeter of the watchtower loft for an open-air scouting platform.

More Ideas to Come in Future Addition