Engaging children in creative arts and crafts is one of the most effective ways to spark imagination, develop fine motor skills, and foster independent thinking. In a world increasingly dominated by digital screens, hands-on crafting offers a rich tactile experience that encourages patience, problem-solving, and self-expression.
Whether you are looking for rainy-day activities, weekend project inspiration, or easy DIY art ideas using household recyclables, crafting provides an endless canvas for kids to explore. Creativity isn’t about perfection; it’s about the process of exploring colors, textures, and shapes. Here are 20 amazing, realistic, and Pinterest-friendly craft ideas designed to inspire young artists, complete with step-by-step guides, helpful tips, materials needed, and creative variations.
1. Celestial Painted Pebble Galaxy Stones
What This Idea Means
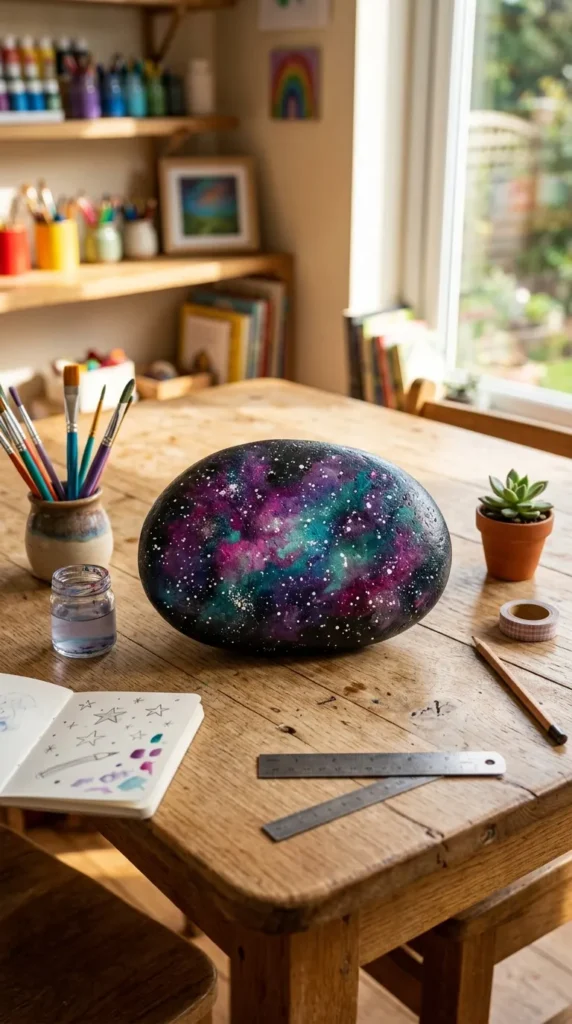
Celestial Painted Pebble Galaxy Stones involve transforming smooth river rocks into glowing mini-galaxies using layers of acrylic paint and splattered stars. This activity teaches children about color blending, layering, and cosmic patterns while turning natural objects into pocket-sized treasures.
How to Make It
- Prepare the Base: Clean and dry smooth, dark river pebbles. Paint the entire surface with a base coat of black or dark navy blue acrylic paint and let it dry completely.
- Sponge the Nebula: Use a small piece of natural sponge or cotton ball dipped in bright pink, purple, teal, and magenta paint. Lightly dab the colors in swirly, cloud-like formations onto the stone.
- Add Deep Shadows: Lightly dab tiny hints of deep blue around the edges to give the nebula depth.
- Splatter Stars: Dip an old toothbrush into white acrylic paint. Hold it over the stone and flick the bristles with your thumb to create a fine mist of tiny white stars.
- Detail Highlights: Use a fine-tip paint pen to draw small four-pointed stars or tiny crescent moons. Once dry, seal with a clear varnish.
Tips and Variations
- Tips: Work in thin, dry layers so the colors don’t bleed into a muddy grey.
- Variations: Instead of galaxies, paint constellation maps, glowing neon planets, or metallic gold moon phases.
Materials Needed
- Smooth river stones
- Acrylic paints (black, purple, magenta, teal, white)
- Kitchen sponge pieces or cotton balls
- Old toothbrush
- Fine-point white paint pen
- Clear sealing spray or mod podge
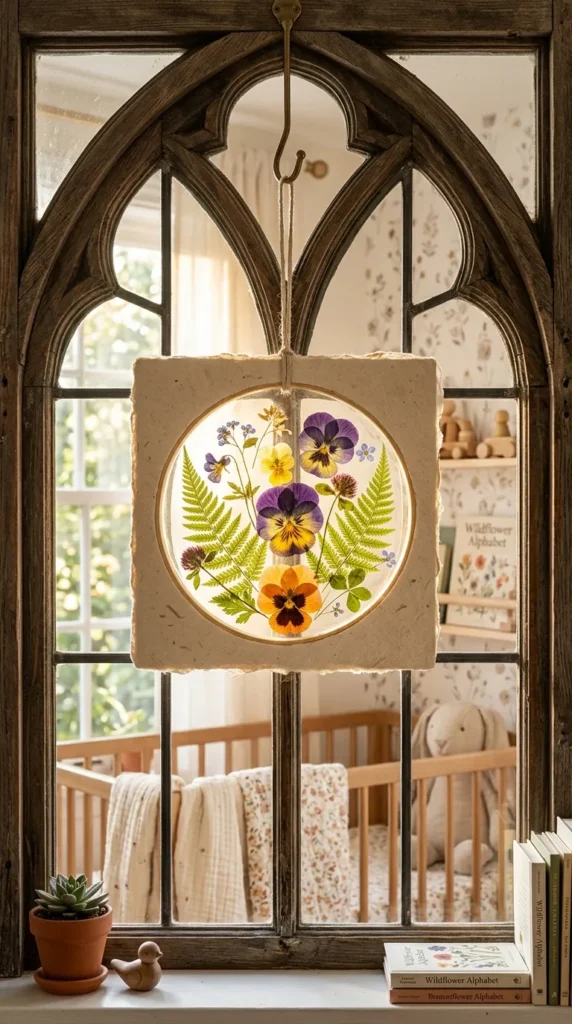
2. Vibrant Pressed Flower Sun Catchers
What This Idea Means
This project captures the delicate beauty of nature by pressing real flowers and leaves between clear sheets to create stained-glass style window hangers. It combines an outdoor nature walk with artistic arrangement and light play.
How to Make It
- Forage & Press: Collect thin wildflowers, petals, and small leaves. Press them inside heavy books lined with parchment paper for 3 to 5 days until flat and dry.
- Prepare the Frame: Cut a thick frame out of sturdy cardstock or heavy paper plate rings. Cut two pieces of clear self-adhesive contact paper to fit the frame.
- Arrange Nature: Peel the backing off one piece of contact paper. Have the child arrange the dried petals and leaves sticky-side up inside the central frame area.
- Seal the Craft: Carefully place the second sheet of contact paper over the arrangement, pressing firmly from the center outward to smooth out air bubbles.
- Finish: Trim any excess paper, punch a hole at the top, and tie a loop of natural jute twine for hanging.
Tips and Variations
- Tips: Avoid thick flower bulbs like roses; delicate petals like pansies, daisies, and fern fronds press best.
- Variations: Replace contact paper with wax paper and seal using a warm iron (with adult supervision) for a matte vintage finish.
Materials Needed
- Freshly pressed flowers and leaves
- Clear contact paper
- Colored cardstock or paper plates
- Scissors
- Hole puncher
- Jute twine or ribbon
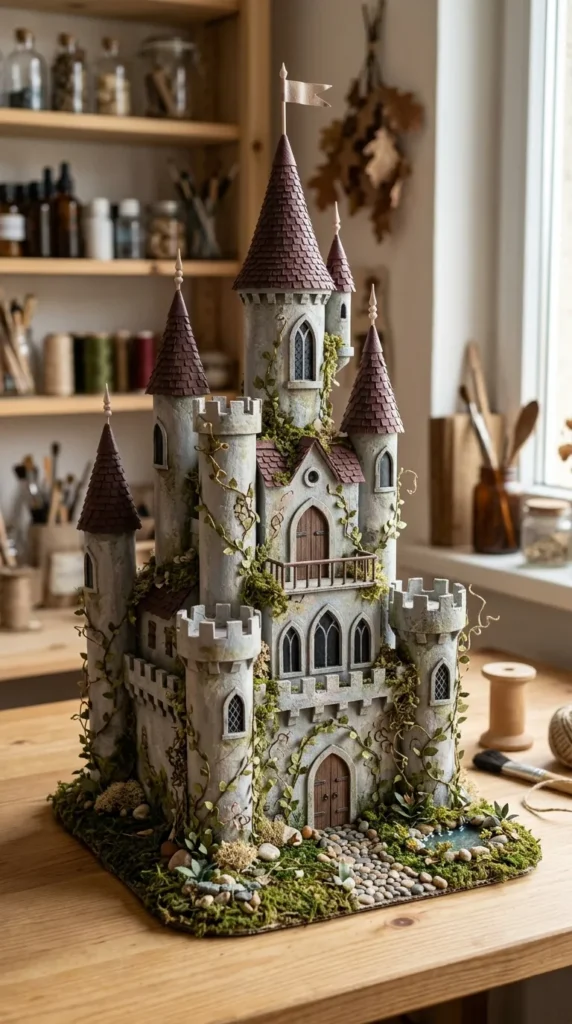
3. Whimsical Cardboard Tube Fairy Castles
What This Idea Means
Upcycling everyday toilet paper rolls and paper towel tubes into magical, multi-tiered fairy castles encourages structural design and storytelling. Kids learn to re-imagine discarded materials into charming miniature architecture.
How to Make It
- Build the Towers: Gather cardboard tubes of varying heights. Cut small rectangular notches at the top of some tubes to create stone battlements.
- Paint the Structures: Paint the tubes with soft pastel or stony-grey washable craft paint. Add painted brick textures, climbing vines, and arched wooden doors using markers or detail brushes.
- Craft Roof Cones: Cut colorful construction paper circles, make a single slit to the center, overlap the edges to form a cone, and glue it closed. Secure the cones onto the top of the tower tubes.
- Assemble the Castle: Glue multiple towers together onto a sturdy cardboard base. Add glitter accents, tissue paper moss, and twig drawbridges.
Tips and Variations
- Tips: Use a hot glue gun (operated by an adult) to secure the towers together quickly without slipping.
- Variations: Transform the castle into a dark dragon fortress using black and crimson paint with metallic silver accents.
Materials Needed
- Cardboard tubes (various sizes)
- Construction paper
- Washable craft paint and markers
- Craft glue or hot glue
- Scissors
- Decorative extras (glitter, moss, small twigs)
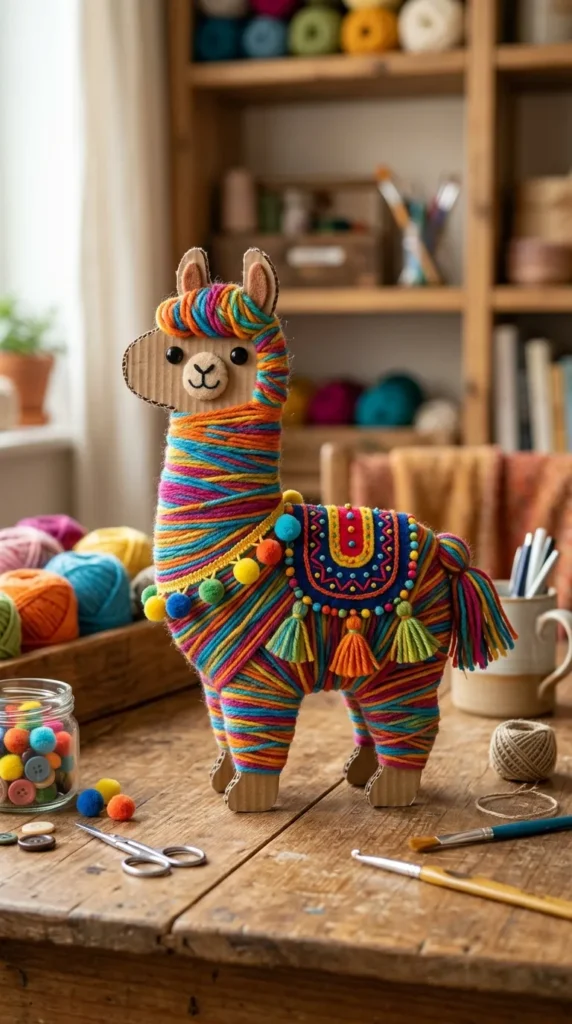
4. Textured Yarn-Wrapped Cardboard Llamas
What This Idea Means
Yarn wrapping is a wonderful tactile project that improves fine motor dexterity and hand-eye coordination. Wrapping soft, colorful yarn around a sturdy cardboard cutout creates a cozy, textured 3D llama figure.
How to Make It
- Trace & Cut: Draw a simple silhouette of a llama on heavy corrugated cardboard and cut it out.
- Anchor the Yarn: Tie or tape the end of a colorful yarn ball to the center of the cardboard llama body.
- Wrap the Body: Wrap the yarn tightly around the torso, overlapping layers until the cardboard is completely covered in a thick, fluffy coat. Secure the end with a knot or dab of glue.
- Add Details: Draw facial features onto the cardboard head with black markers. Glue on tiny felt blankets, miniature pom-poms around the neck, and wooden bead tassels.
Tips and Variations
- Tips: Cut small notches along the cardboard edges to prevent yarn from slipping off curves while wrapping.
- Variations: Use the same wrapping technique to make yarn monster figures, rainbow fish, or winter trees.
Materials Needed
- Heavy corrugated cardboard
- Colorful yarn (variegated yarn looks great)
- Scissors
- Felt scraps and mini pom-poms
- Craft glue or tape
- Black marker
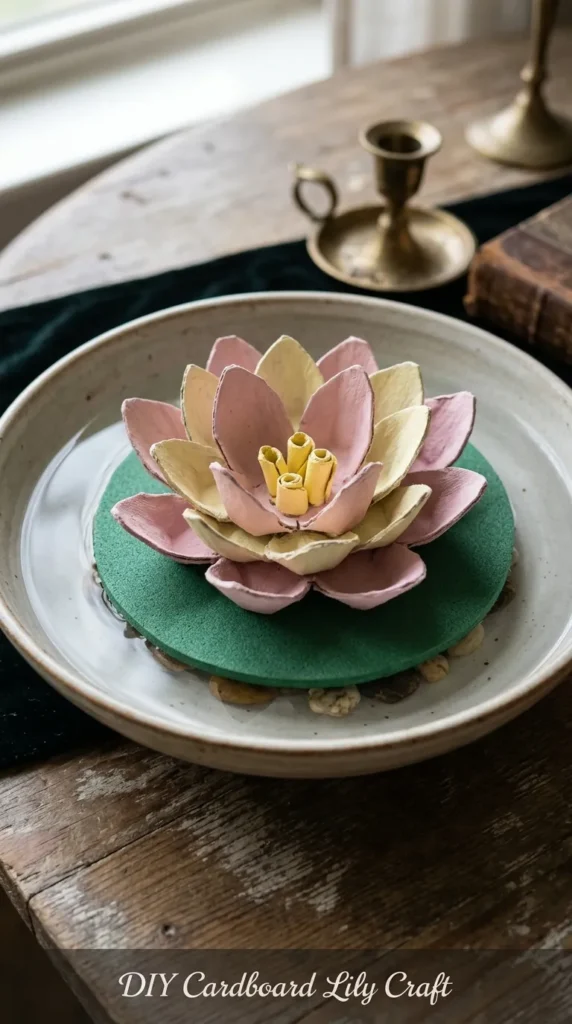
5. Recycled Egg Carton Floating Water Lilies
What This Idea Means
This eco-friendly craft transforms ordinary cardboard egg cartons into soft, layered water lily blossoms. The finished flowers can float on water in sensory bins or serve as beautiful spring table decor.
How to Make It
- Cut the Cups: Cut individual egg cups out of a cardboard egg carton. Trim the top edges of each cup into rounded petal shapes.
- Layer the Petals: Nest 2 to 3 egg cups inside each other, offset the petals, and glue them together at the base to create a dense, full flower bloom.
- Paint the Lily: Paint the petals with soft pink, white, and yellow acrylic or tempera paint. Paint a yellow circle in the center for stamens.
- Attach Lily Pad: Cut a wide green leaf with a V-notch out of foam sheet or heavy cardstock and glue the painted egg carton lily directly onto it.
Tips and Variations
- Tips: Use waterproof foam sheets for the lily pad base if you plan to float the flowers in water.
- Variations: Add tiny yellow pom-poms or rolled yellow fringe paper to the center to mimic detailed flower stamens.
Materials Needed
- Cardboard egg cartons
- Washable craft paints (pink, yellow, green, white)
- Green craft foam sheets or cardstock
- Scissors
- Craft glue
- Yellow pom-poms (optional)
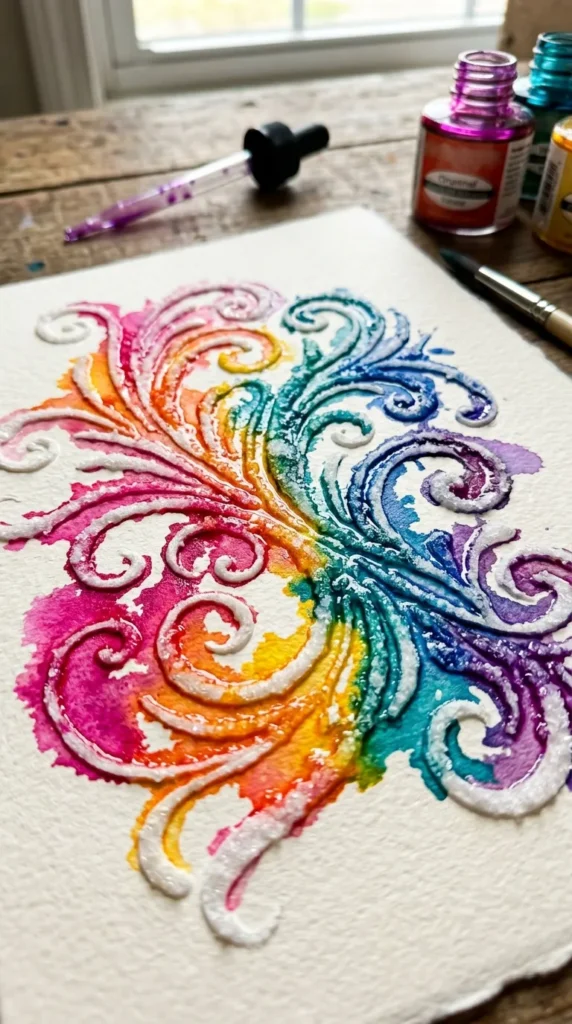
6. Vibrant Salt-Painted Rainbow Swirls
What This Idea Means
Salt painting is an engaging science-meets-art project. Glue lines are coated in table salt and then touched with liquid watercolors. The salt instantly absorbs the colored water through capillary action, creating glowing, dimensional art.
How to Make It
- Draw with Glue: On a thick piece of cardstock or watercolor paper, squeeze liquid white school glue in swirling rainbow paths, mandala patterns, or ocean waves.
- Coat with Salt: Completely cover the wet glue lines with table salt. Tilt the paper over a tray to shake off all loose, excess salt.
- Apply Paint: Dip a soft paint brush into diluted liquid watercolor or food coloring mixed with water. Touch the wet brush tip gently to the salt line—watch the color magically travel down the salt path!
- Dry Completely: Allow the artwork to air dry overnight without touching the raised salt ridges.
Tips and Variations
- Tips: Use heavy cardstock or canvas boards; standard copy paper will warp and soak through from the moisture.
- Variations: Try making neon space scenes, name sign letters, or jellyfish tentacles using this technique.
Materials Needed
- Heavy watercolor paper or cardstock
- White liquid school glue
- Table salt
- Liquid watercolors or food coloring
- Fine watercolor paintbrush
- Baking tray (to catch loose salt)


7. Wooden Spoon Fairytale Puppets
What This Idea Means
Transforming basic wooden kitchen spoons into lively puppet characters is a classic craft that bridges visual art and imaginative dramatic play. Kids can design royalty, animals, or fantasy creatures for custom puppet shows.
How to Make It
- Paint the Face: Paint the rounded bowl of a wooden spoon in skin tones or character colors. Draw eyes, smiles, and rosy cheeks using paint pens or markers.
- Add Hair: Glue yarn strands, wool roving, or paper strips around the top curved rim of the spoon to make hair, braids, or crowns.
- Dress the Handle: Wrap fabric scraps, felt pieces, lace, or ribbon around the spoon’s wooden handle to create custom clothing, capes, or gowns.
- Add Accents: Attach googly eyes, sequins, tiny fabric bows, or pipe cleaner arms to complete the character.
Tips and Variations
- Tips: Wooden spoons with flat oval bowls work best for painting detailed faces.
- Variations: Turn spoons upside down to create animals like lions with yarn manes, owls, or frogs.
Materials Needed
- Wooden cooking spoons
- Craft paints and fine markers
- Yarn and fabric scraps
- Googly eyes
- Pipe cleaners
- Tacky glue or craft glue
8. DIY Paper Plate Mosaic Sea Turtles
What This Idea Means
Mosaic crafting teaches pattern formation, spatial awareness, and texture building. By gluing torn or cut paper tiles onto a curved paper plate, kids construct a textured shell for a swimming sea turtle.
How to Make It
- Prepare Shell: Turn a paper plate upside down to serve as the dome-shaped turtle shell.
- Cut Tiles: Tear or cut green, turquoise, teal, and blue construction paper into small square tiles.
- Build the Mosaic: Apply glue over the paper plate surface and press the paper squares down close together, leaving tiny white gaps between them like real turtle shell plates.
- Add Body Parts: Cut a head, four flippers, and a small pointed tail from dark green cardstock. Glue these body pieces under the rim of the paper plate.
- Final Touch: Draw eyes on the turtle head with markers or add googly eyes.
Tips and Variations
- Tips: Tearing paper by hand creates a organic, textured look, while cutting with scissors yields a clean geometric pattern.
- Variations: Use metallic foil paper or tissue paper squares to make glowing rainbow fish or peacock mosaic plates.
Materials Needed
- Paper plates
- Construction paper (greens, blues, teals)
- Green cardstock
- Glue stick or liquid glue
- Scissors
- Markers or googly eyes
9. Colorful Tissue Paper Suncatcher Mandalas
What This Idea Means
Suncatcher mandalas use vibrant tissue paper overlapping shapes to teach symmetry and color theory. When taped onto a sunny window, light streams through the translucent layers, illuminating vibrant stained-glass patterns.
How to Make It
- Cut the Frame: Cut a black cardstock circle and hollow out the center, leaving a dark rim frame. Cut internal black paper strips to create geometric spokes or grid sections.
- Prepare Tissue Shapes: Cut translucent tissue paper into various shapes—triangles, circles, squares, and diamonds—in a bright spectrum of colors.
- Layer the Tissue: Glue the tissue paper pieces across the open frame, overlapping colors to produce new secondary hues (e.g., overlapping yellow and blue to make green).
- Trim and Display: Trim any tissue paper extending beyond the outer black ring frame. Tape to a window glass pane using clear tape.
Tips and Variations
- Tips: Use a glue stick diluted slightly with water or a thin coat of Mod Podge applied with a foam brush for smooth coverage.
- Variations: Cut frames into heart, star, butterfly, or leaf silhouettes instead of circular mandalas.
Materials Needed
- Black cardstock
- Assorted colorful tissue paper
- Scissors
- Glue stick or Mod Podge
- Clear tape for window hanging
10. Whimsical Painted Clay Leaf Dish
What This Idea Means
Working with air-dry clay introduces kids to sculpture and tactile 3D design. Using real leaves to stamp intricate vein impressions creates functional, nature-inspired decorative catch-all dishes.
How to Make It
- Roll the Clay: Roll out a lump of air-dry clay on parchment paper until it is roughly 1/4 inch thick.
- Impression: Place a large, fresh leaf (vein-side down) onto the clay. Roll over it firmly with a rolling pin to press details deep into the clay.
- Cut the Shape: Carefully trace around the outer leaf border with a dull plastic knife and peel away excess clay.
- Form the Bowl: Lift the clay leaf and gently press it into a small real bowl lined with plastic wrap to curl the edges upward into a shallow dish shape.
- Dry & Paint: Let dry for 24-48 hours. Paint with acrylics, emphasizing leaf veins with darker shades, and seal with glossy varnish.
Tips and Variations
- Tips: Fresh leaves with thick, raised veins (like maple, oak, or monstera leaves) give the sharpest clay impressions.
- Variations: Stamp lace fabric, rubber stamps, or seashells into the clay instead of botanical leaves.
Materials Needed
- Air-dry modeling clay
- Fresh leaves with prominent veins
- Rolling pin
- Plastic knife
- Acrylic paints and paintbrushes
- Glossy varnish or Mod Podge
11. Upcycled Plastic Bottle Jellyfish Mobile
What This Idea Means
This eco-friendly craft transforms clear plastic water bottles and colorful yarn into floating, ethereal ocean jellyfish that gently spin in room breezes.
How to Make It
- Cut the Bottle: An adult should cut off the top dome portion of a clean plastic water bottle to serve as the jellyfish head.
- Paint the Dome: Paint the inside or outside of the plastic dome with translucent acrylic or glass paint in iridescent purples, blues, and pinks.
- Attach Tentacles: Punch several holes around the bottom rim of the plastic dome. Thread long strands of wavy yarn, ribbon, bubble wrap strips, and iridescent curling ribbon through the holes, tying knots inside to secure them.
- Hang: Thread a hanging loop through the top cap hole to suspend the jellyfish from the ceiling.
Tips and Variations
- Tips: Use a combination of different ribbons and thin fabric strips to give the tentacles varied realistic textures.
- Variations: Add glow-in-the-dark paint accents to turn the jellyfish into glowing deep-sea bioluminescent creatures.
Materials Needed
- Empty plastic drink bottles
- Scissors / craft knife (adult use)
- Acrylic or glass paint
- Assorted ribbon, yarn, and iridescent film
- Hole puncher
- Hanging string
12. Decorative Wooden Clothespin Dragonflies
What This Idea Means
Repurposing wooden spring clothespins into glittering dragonflies is an easy, fast-drying craft that encourages color experimentation and detailed decoration.
How to Make It
- Paint the Clothespin: Paint a wooden spring clothespin with bright acrylic paint or metallic colors. Add small dot patterns along the spine using a toothpick dipped in contrasting paint.
- Craft the Wings: Fold a sparkling pipe cleaner into two figure-eight wing loops, or cut wings out of clear plastic or glitter cardstock.
- Assemble: Clip or glue the wings into the middle spring groove of the clothespin.
- Add Eyes: Glue two small googly eyes or tiny sparkling rhinestones to the top clipping tip of the clothespin.
Tips and Variations
- Tips: Glue a small magnet strip to the back of the clothespin to turn your dragonfly into a functional refrigerator clip.
- Variations: Wrap the wooden body in metallic wire or colorful embroidery thread instead of painting.
Materials Needed
- Wooden spring clothespins
- Glitter pipe cleaners or cardstock
- Acrylic paint and toothpicks
- Small googly eyes or mini rhinestones
- Craft glue or hot glue
- Magnet strip (optional)
13. Origami Paper Jumping Frogs
What This Idea Means
Origami introduces children to geometry, folding precision, and spatial relations. Folding paper into dynamic jumping frogs combines papercraft with interactive fun.
How to Make It
- Start Square: Begin with a square piece of green origami paper or lightweight cardstock.
- Fold Diagonals: Fold the paper in half horizontally, vertically, and along both diagonals, creasing sharply, then collapse into a triangle tent shape.
- Form Legs: Fold the outer corners upward to form the front legs, then fold the lower section upward and inward to shape the body and back jumping legs.
- Create the Spring: Make a accordion spring fold near the back end of the frog body—this creates the spring action!
- Play: Press down on the back spring tab with a finger and slide off to send the frog hopping into the air.
Tips and Variations
- Tips: Use genuine lightweight origami paper for sharp folds; heavy cardstock makes jumping springs too stiff to hop.
- Variations: Glue on tiny googly eyes and draw spots with markers to customize your frog species.
Materials Needed
- Green origami paper (or square paper)
- Googly eyes (optional)
- Fine-tip black marker


14. Cinnamon-Scented Salt Dough Ornaments
What This Idea Means
Salt dough crafts offer a classic, sensory-rich sculpting experience. Adding cinnamon gives the dough an aromatic twist, making it perfect for keepsake ornaments, tags, and wall hangings.
How to Make It
- Mix Dough: Combine 2 cups all-purpose flour, 1 cup fine salt, 1/2 cup ground cinnamon, and 1 cup warm water in a bowl. Knead until smooth and pliable.
- Roll & Cut: Roll the dough flat on a floured surface to 1/4-inch thickness. Cut out shapes using cookie cutters (stars, hearts, animals).
- Punch Hanging Hole: Use a drinking straw to punch a clean hole near the top edge of each shape.
- Bake & Finish: Bake on a parchment-lined sheet at 200°F (95°C) for 2 to 3 hours until completely hard. Once cool, paint or leave natural, then thread with twine.
Tips and Variations
- Tips: Ensure the dough is baked fully at low temperatures; baking too fast at high heat causes the dough to puff up and crack.
- Variations: Press dried star anise or clove studs into the wet dough before baking for extra scent and visual charm.
Materials Needed
- All-purpose flour
- Fine table salt
- Ground cinnamon
- Warm water
- Cookie cutters
- Drinking straw
- Twine or ribbon
15. Handprint Felt Animal Keepsake Pouch
What This Idea Means
Transforming a child’s handprint tracing into a functional felt pocket pouch creates a cherished personal keepsake. It combines sewing or gluing basics with personalized hand shape design.
How to Make It
- Trace & Cut: Trace your child’s hand onto two pieces of thick colorful craft felt. Cut out both hand shapes.
- Join the Palms: Place the two felt hand cutouts together. Sew around the outer edge of the palm using embroidery thread (or secure with fabric glue), leaving the wrist opening unstitched to form a pocket opening.
- Decorate Character: Turn the fingers into animal ears or feathers! Decorate the hand palm with felt cutouts to create an owl, fox, kitten, or monster face.
- Add Strap: Attach a braided yarn cord to the top edges to wear as a small shoulder pouch.
Tips and Variations
- Tips: Use stiff craft felt rather than thin soft felt so the pouch maintains its shape when filled with small toys.
- Variations: Instead of an animal, turn the handprint into a superhero mask holder or small coin pouch.
Materials Needed
- Stiff craft felt sheets (various colors)
- Scissors
- Fabric glue or plastic needle with embroidery thread
- Yarn
- Buttons or felt scraps for features
16. Whimsical Painted Birch Twig Wind Chimes
What This Idea Means
This outdoor-inspired project combines gathering natural materials with painting and acoustics. Assembled twigs and wooden beads click softly in the wind, bringing color and natural music to gardens or patios.
How to Make It
- Forage & Paint: Collect sturdy birch twigs or smooth driftwood sticks. Paint colorful ring bands, stripes, and dots on each stick with weather-resistant outdoor acrylic paint.
- Main Support: Select one thick stick to act as the horizontal hanging bar.
- Attach Strands: Tie strong nylon cord or jute twine to each smaller painted twig. Thread wooden beads and metal washers onto the cord below each stick.
- Assemble Chime: Space out and tie the vertical stick strands along the main support bar so they gently touch when swaying.
Tips and Variations
- Tips: Add metal washers or tiny brass bells between the sticks to create a pleasant ringing sound when they bump together.
- Variations: Paint the sticks with outdoor glow-in-the-dark paint for a magical nighttime garden view.
Materials Needed
- Natural twigs or small driftwood sticks
- Outdoor acrylic paints
- Jute twine or strong fishing line
- Wooden beads and small metal washers or bells
- Scissors
17. Vibrant Bubble-Wrap Printed Stamps
What This Idea Means
Repurposing plastic bubble wrap as a printing texture tool allows kids to quickly stamp detailed honeycombs, dragon scales, or reptile patterns onto paper surfaces.
How to Make It
- Make the Stamp: Wrap a small section of bubble wrap around a small wooden block or cardboard square, taping it securely on the back to make an easy-to-hold handle.
- Apply Paint: Use a foam brush or roller to coat the raised bubble surface with washable tempera paint.
- Stamp Paper: Press the painted bubble surface firmly down onto paper and lift cleanly to reveal a hexagonal pattern.
- Incorporate Art: Use honeycomb prints as background textures for beehive drawings, mermaid tail scales, or pineapple skins.
Tips and Variations
- Tips: Don’t overload the bubble wrap with paint, or the gaps between bubbles will fill in and smudge the pattern.
- Variations: Cut bubble wrap directly into fruit, leaf, or animal shapes before stamping.
Materials Needed
- Plastic bubble wrap
- Small wooden blocks or cardboard pieces
- Washable tempera or acrylic paint
- Foam paint brushes
- Drawing paper
- Tape
18. Decorative Paper Bag Tree Sculpture
What This Idea Means
Twisting a basic brown paper lunch bag creates a sturdy 3D tree trunk with realistic bark texture and expanding branches, teaching form and sculpture out of flat paper.
How to Make It
- Cut the Top: Cut straight vertical strips down the top half of a flat brown paper bag to form branch strands, leaving the bottom half intact.
- Twist the Trunk: Open the bag slightly, rest the bottom flat on a table, and twist the solid middle section tightly to form the tree trunk.
- Twist the Branches: Take pairs of the cut top paper strips and twist them together tightly, splitting them into smaller twig ends outward.
- Add Foliage: Glue tiny green tissue paper squares, pom-poms, or real dried moss onto the twisted branch tips.
- Secure Base: Glue the bottom flat base of the bag to a piece of cardboard so the tree stands tall.
Tips and Variations
- Tips: Spritzing the paper bag lightly with water can make it softer and easier for small hands to twist without tearing.
- Variations: Use pink tissue paper to create a Japanese cherry blossom tree, or autumn colors (orange, yellow, red) for a fall oak.
Materials Needed
- Brown paper lunch bags
- Scissors
- Colorful tissue paper or craft moss
- Tacky glue
- Sturdy cardboard base
19. Sparkling Marble-Inked Shaving Cream Prints
What This Idea Means
This printmaking technique uses shaving cream as a floating base for paint drips. Swirling the paint creates gorgeous marbleized prints on paper, offering a high-reward tactile experiment.
How to Make It
- Prepare Shaving Cream Bed: Spray a thick, even layer of basic white foam shaving cream into a shallow tray. Smooth the top surface flat with a ruler.
- Drip Color: Drip several drops of liquid watercolor or food coloring across the shaving cream surface.
- Swirl Patterns: Drag a toothpick or plastic fork through the paint drops to create swirled marble patterns.
- Take the Print: Press a piece of thick cardstock gently onto the swirled cream, then lift carefully.
- Scrape Clean: Use a straight ruler edge to scrape away all the excess shaving cream—revealing a crisp, vibrant marble print underneath!
Tips and Variations
- Tips: Use traditional white foam shaving cream; clear gel shaving creams will not hold the floating paint layers.
- Variations: Use these marbled papers as custom gift wrap, greeting cards, or book covers.
Materials Needed
- White foam shaving cream
- Shallow baking tray
- Liquid watercolors or food coloring
- Toothpicks or plastic forks
- Ruler or plastic scraper
- Heavy cardstock paper
20. Colorful Beaded Pipe Cleaner Butterflies
What This Idea Means
Combining pipe cleaners with colorful pony beads allows children to practice fine motor threading and sculptural bending, resulting in vibrant 3D butterflies that can perch anywhere.
How to Make It
- Thread the Wings: Bend two pipe cleaners into oval wing loops. Thread colorful pony beads onto both pipe cleaners, leaving small open ends.
- Form Upper & Lower Wings: Twist each beaded pipe cleaner into a figure-eight shape to form upper and lower wing pairs.
- Build the Body: Take a third pipe cleaner, wrap it around the center where the wings meet, and twist tightly.
- Add Antennae: Leave the top ends of the center pipe cleaner extending upward, curling the tips outward to form realistic antennae.
Tips and Variations
- Tips: Fold over the sharp metal tips of the pipe cleaners slightly before threading beads so the wire doesn’t scratch small hands.
- Variations: Clip a clothespin onto the center body so your butterfly can clip onto curtain edges or indoor plant stems.
Materials Needed
- Colorful pipe cleaners (chenille stems)
- Plastic pony beads (assorted colors)
- Scissors


