There is a quiet magic in gathering around a shared table with simple materials, uncapping paints, rolling out raw clay, and letting the pace of the day slow down. In a modern world saturated with quick digital entertainment and fleeting screen time, intentional hands-on creating offers families a grounding, deeply tactile way to connect. True crafting with family is not about perfection, rigid templates, or cookie-cutter kits that end up tucked away in drawers. Instead, it is about transforming raw, organic, and accessible everyday materials into meaningful decor, heartfelt keepsakes, and functional heirlooms that you are genuinely proud to display on your open shelves, mantlepieces, and living spaces.
The philosophy behind aesthetic family crafting balances three essential pillars: simplicity, natural elegance, and shared creative agency. When children and adults collaborate on projects using tactile mediums like terracotta, linen, pressed botanicals, recycled paper, and beeswax, everyone finds their own rhythm. Toddlers and younger children can focus on sensory exploration, rolling textures, or arranging wild greenery, while older kids and parents can focus on structure, composition, and fine finishing touches.
The following 20 comprehensive family craft projects have been designed with a modern, earthy, and warm aesthetic in mind. Each project features detailed instructions, material lists, mindful variations, and practical tips to ensure your family craft sessions yield timeless decor pieces that celebrate the beauty of handcrafted life.
1. Botanical Sun Prints on Natural Linen Paper
What This Idea Means
Botanical sun printing, also known as cyanotype or solar exposure printing, blends natural foraging with scientific wonder. It allows families to capture the precise, delicate silhouettes of backyard ferns, delicate petals, and ornamental grasses directly onto rich, heavyweight textured paper or raw linen fabric using the power of natural sunlight. This craft turns a simple nature walk into an artistic journey, yielding deep Prussian blue or organic sepia prints that rival museum-grade botanical illustrations.
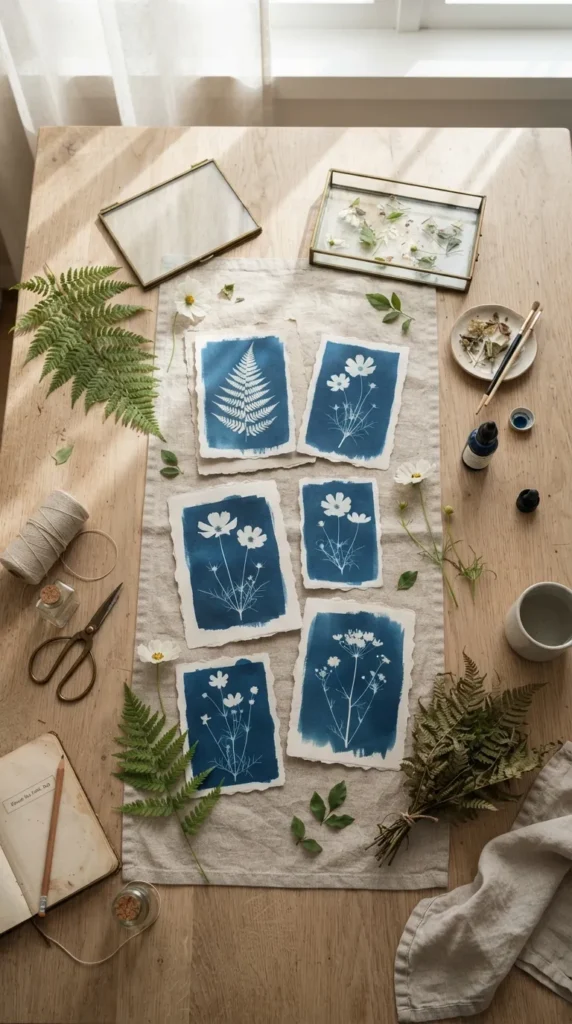
What You Need to Make It
- Cold-press watercolor paper or untreated raw natural linen fabric sheets
- Non-toxic cyanotype emulsion chemicals (Part A: Ferric Ammonium Citrate, Part B: Potassium Ferricyanide) or pre-sensitized solar print sheets
- Assorted freshly foraged botanical leaves, pressed ferns, flat wildflower heads, and ornamental grasses
- A flat sheet of clear acrylic, plexiglass, or picture frame glass
- A sturdy wooden backing board with binder clips
- A shallow rinsing tray filled with cool, clean tap water
- A small sponge brush or wide foam applicator
Step-by-Step Instructions
- Foraging and Preparation: Take a walk through your garden, local park, or neighborhood trails to gather flora with distinct, recognizable profiles. Flat leaves, intricate fern fronds, cosmos flowers, and slender field grasses work best. Keep them pressed lightly inside a book until you are ready.
- Sensitizing the Surface: If you are using raw watercolor paper, mix equal parts of cyanotype solutions A and B in a dim room out of direct sunlight. Use a foam brush to apply an even, light coat across the paper surface in smooth horizontal and vertical strokes. Allow the paper to dry completely in a dark closet or drawer.
- Composing the Print: In a shaded room, lay your dry sensitized paper onto the wooden backing board. Arrange your pressed botanicals carefully on top of the coated surface. Encourage children to create balanced geometric or flowing organic compositions.
- Securing the Frame: Carefully place the sheet of clear glass or acrylic over the botanicals and clamp the edges tightly to the backing board with binder clips. This ensures the leaves stay completely flat against the paper, preventing blurry outlines.
- Sunlight Exposure: Carry the clamped frame out into direct midday sunlight. Expose the frame for 3 to 8 minutes, depending on the intensity of the sun. Watch as the exposed chemical shifts from an olive-bronze shade to a deep slate blue.
- Rinsing and Fixing: Bring the frame back inside, remove the glass and plants, and submerge the paper directly into a tray of cold running water. Rinse gently for 4 to 5 minutes until all yellow-green chemical residues wash away, leaving crisp, white plant silhouettes against a deep indigo backdrop.
- Drying: Lay the finished prints flat on a clean linen towel to dry naturally, then press them under heavy books overnight for a crisp finish.
Tips and Variations
- Hydrogen Peroxide Intensifier: Add a single tablespoon of standard household hydrogen peroxide to your final water rinse bath. This instantly oxidizes the print, turning the blue background into an ultra-deep, velvety navy blue.
- Fabric Wall Hangings: Swap out paper for raw unbleached linen or organic cotton muslin. Once dry, fray the bottom edges and hang the finished fabric from a smoothed drift branch using natural jute twine.
- Parchment Monograms: Cut out letters or family initials from dense cardstock and combine them with delicate floral stems to make personalized botanical room plaques.