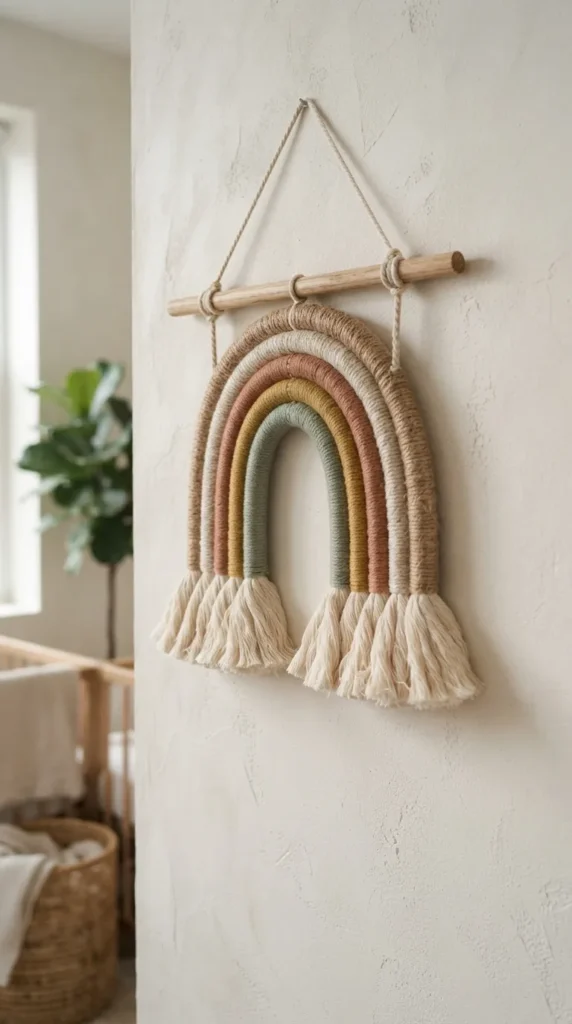
6. Neutral Tone Macramé Rainbow Wall Hangings
What This Idea Means
Moving away from bright neon children’s crafts, neutral-toned macramé rainbows use earthy, modern palettes inspired by Scandinavian nursery decor. Using thick cotton rope wrapped in muted linen yarns, jute, raw wool roving, and terracotta cords, families can build a sculptural, dimensional piece of textile art that brings soft texture to any living room or bedroom wall.
What You Need to Make It
- Thick natural unbleached 3-strand cotton rope (1/2 inch to 3/4 inch diameter)
- Assorted natural yarns, tapestry wools, and embroidery threads in muted tones (oatmeal, sage, mustard, dusty terracotta, mocha, and cream)
- Flexible aluminum craft wire (18-gauge)
- Sharp textile shears
- Heavy-duty tapestry needle
- Low-temperature craft glue gun or strong clear fabric glue
- Wooden hanging ring or wooden decorative beads
Step-by-Step Instructions
- Cutting the Rope Arches: Cut 4 to 5 concentric arcs of thick cotton rope, scaling each piece slightly larger than the last so they nest neatly inside one another to form a classic rainbow arch.
- Reinforcing with Wire: Cut lengths of 18-gauge craft wire slightly shorter than each rope piece. Lay the wire along the back of each rope segment and secure it with tiny dabs of glue or small thread ties. This allows you to bend the rope into neat, structured arches that hold their shape.
- Wrapping the Yarn: Choose your yarn color palette. Tie the end of your first yarn color securely around the base of the smallest rope arch, roughly 1.5 inches from the bottom to leave rope exposed for the fringe. Wrap the yarn tightly and evenly around the rope, keeping each loop flush against the previous one so no white rope shows through.
- Finishing the Wraps: When you reach 1.5 inches from the opposite end, knot the yarn securely at the back and use a tapestry needle to tuck the loose tail underneath the wrapped coils. Repeat this process for each concentric rope arch using your chosen complementary yarn tones.
- Joining the Arcs: Shape the wrapped ropes into nesting semicircles. Use a tapestry needle threaded with strong neutral thread to stitch the arches together from the back side, passing the needle through the inner cotton core of adjacent ropes. Alternatively, secure the arches along the backside using a line of warm glue.
- Brushing the Fringe: Untwist the exposed cotton rope ends at the bottom of the rainbow. Use a fine-tooth comb or wire pet slicker brush to comb out the fibers into a soft, fluffy fringe.
- Trimming: Lay the rainbow flat and use sharp shears to trim the fringe into a clean, uniform horizontal line or an angled modern edge. Attach a small yarn loop or wooden bead to the top center for hanging.
Tips and Variations
- Wooden Bead Accents: Thread raw, unfinished wooden beads along the outermost arch or hang dangling wooden teardrops from the bottom fringe center.
- Velvet and Metallic Ribbons: Swap out standard wool yarn on one of the middle arches for a strip of raw-edge silk chiffon, crushed velvet ribbon, or shimmering metallic copper thread to add dynamic texture.
- Mini Diffuser Rainbows: Leave the exposed cotton fringe unsealed and add 2 drops of lavender or eucalyptus essential oil to the cotton fibers, turning the wall hanging into a natural passive room diffuser.